-
maskiner
-
Lodrette fræsere
Lodrette fræsere
-
Multi-aksede løsninger
Multi-aksede løsninger
-
Drejebænke
Drejebænke
-
Horisontale fræsere
Horisontale fræsere
-
Rundborde og indekser
Rundborde og indekser
-
Automationssystemer
Automationssystemer
-
Bordmaskiner
Bordmaskiner
-
Køb udstyr
Køb udstyr
-
Fabrikationsmaskiner
Fabrikationsmaskiner
KØB AF VÆRKTØJERVIL DU TALE MED NOGEN?Et Haas Factory Outlet (HFO) kan besvare dine spørgsmål og guide dig gennem de bedste valgmuligheder for dig.
CONTACT YOUR DISTRIBUTOR > -
Lodrette fræsere
-
Ekstraudstyr
-
 Spindler
Spindler
Spindler -
 Værktøjsvekslere
Værktøjsvekslere
Værktøjsvekslere -
 4.- | 5.-akse
4.- | 5.-akse
4.- | 5.-akse -
 Revolverhoveder og roterende værktøj
Revolverhoveder og roterende værktøj
Revolverhoveder og roterende værktøj -
 Probing
Probing
Probing -
 Spån- og kølemiddelhåndtering
Spån- og kølemiddelhåndtering
Spån- og kølemiddelhåndtering -
 Haas-styring
Haas-styring
Haas-styring -
 Produktvalg
Produktvalg
Produktvalg -
 Værktøjsbearbejdning og fastgørelse
Værktøjsbearbejdning og fastgørelse
Værktøjsbearbejdning og fastgørelse -
 Emneholder
Emneholder
Emneholder -
 5-akse-løsninger
5-akse-løsninger
5-akse-løsninger -
 Automatisering
Automatisering
Automatisering -
KØB AF VÆRKTØJERVIL DU TALE MED NOGEN?Et Haas Factory Outlet (HFO) kan besvare dine spørgsmål og guide dig gennem de bedste valgmuligheder for dig.
CONTACT YOUR DISTRIBUTOR > -
-
Why Haas
Opdag Haas-forskellen
-
Tjeneste
- Videoer


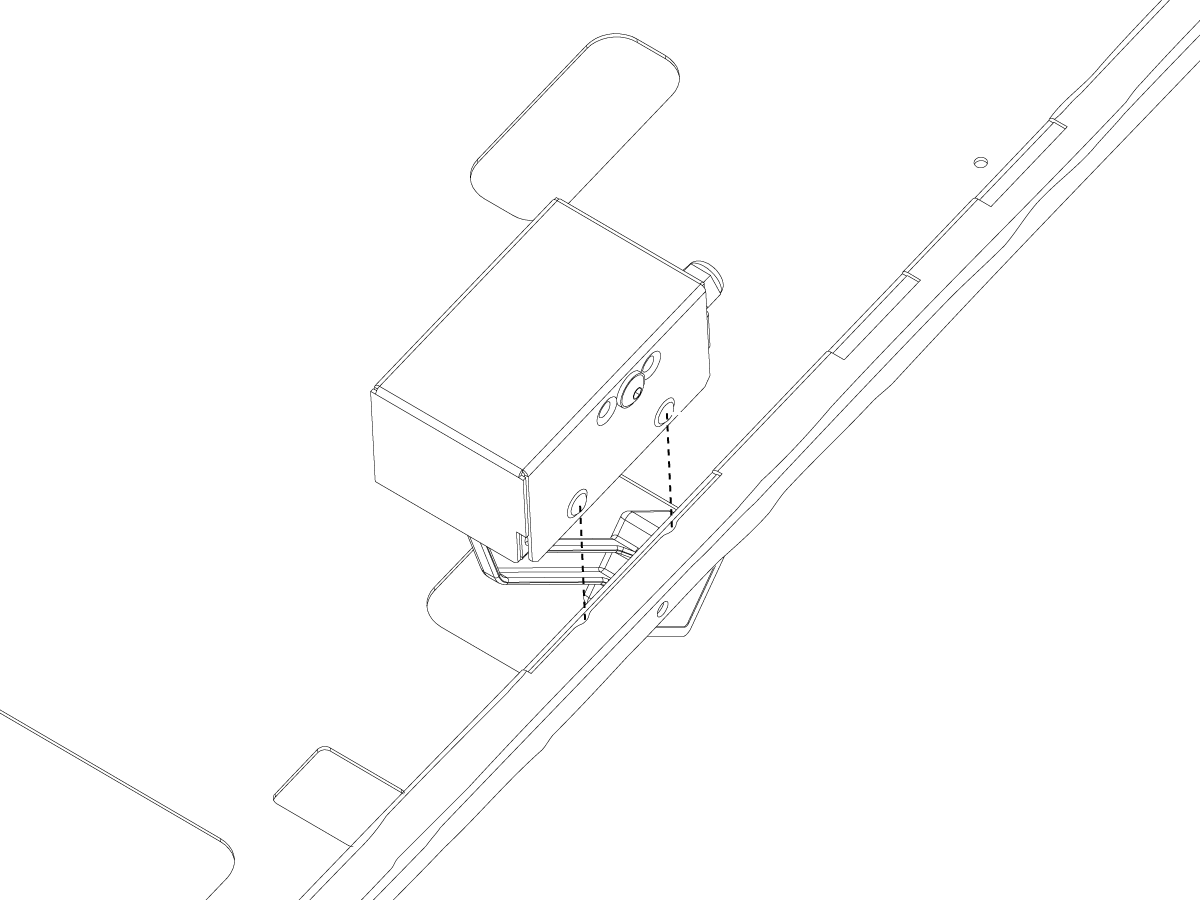
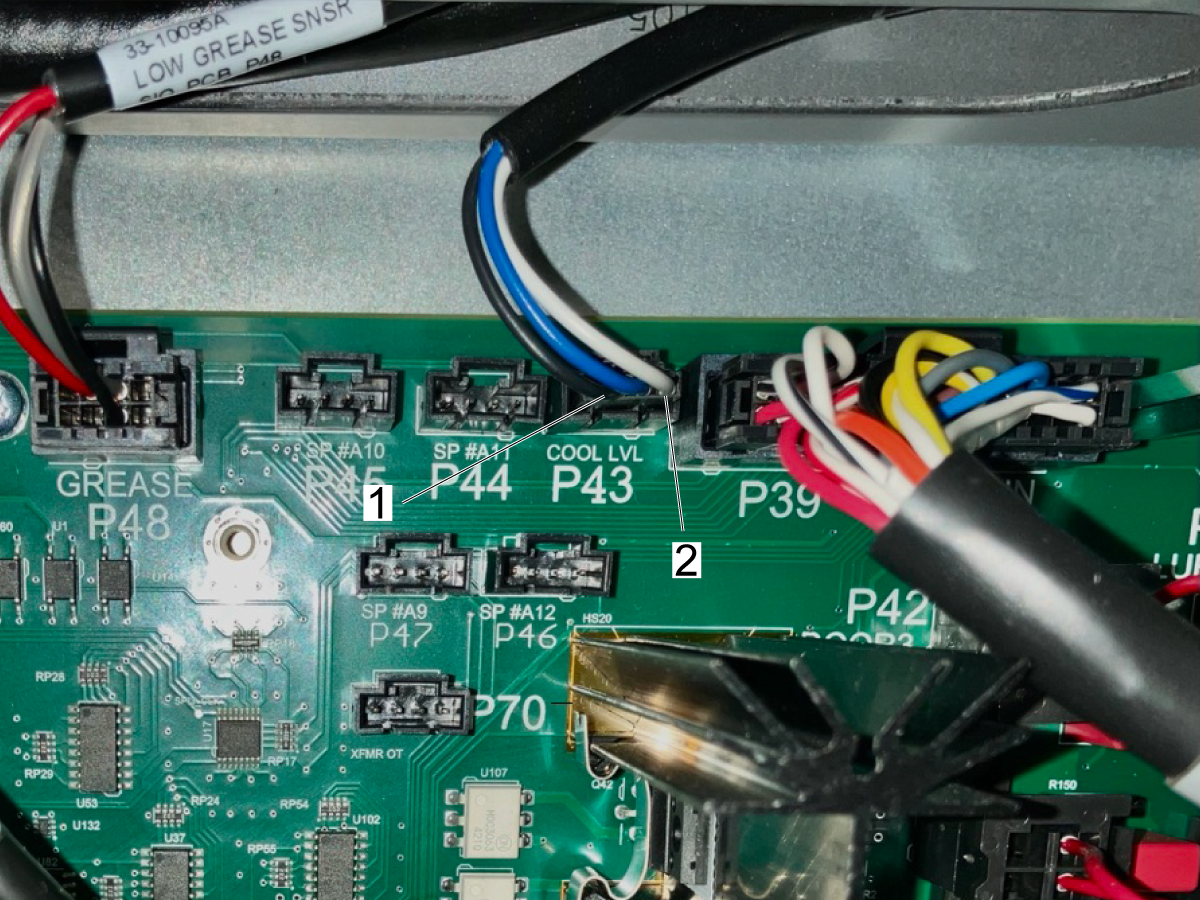
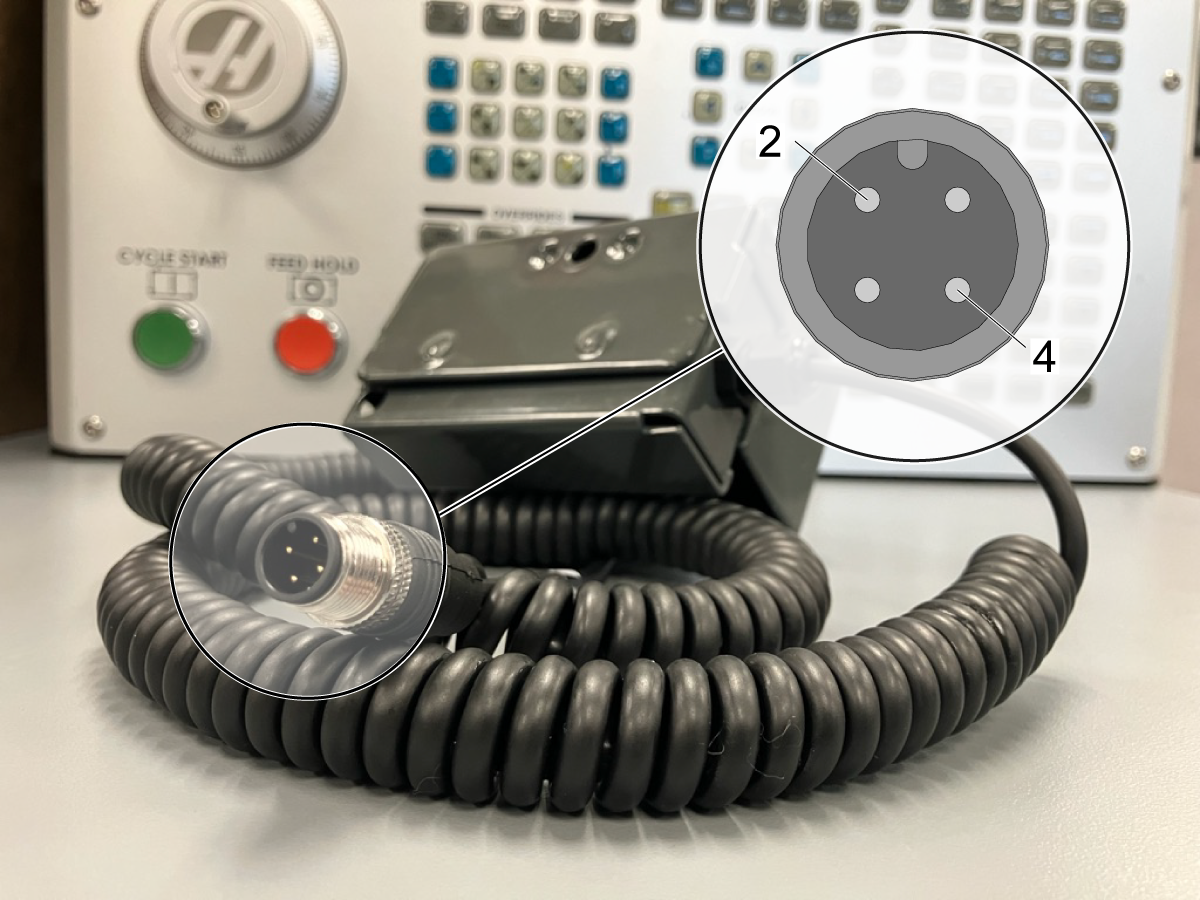
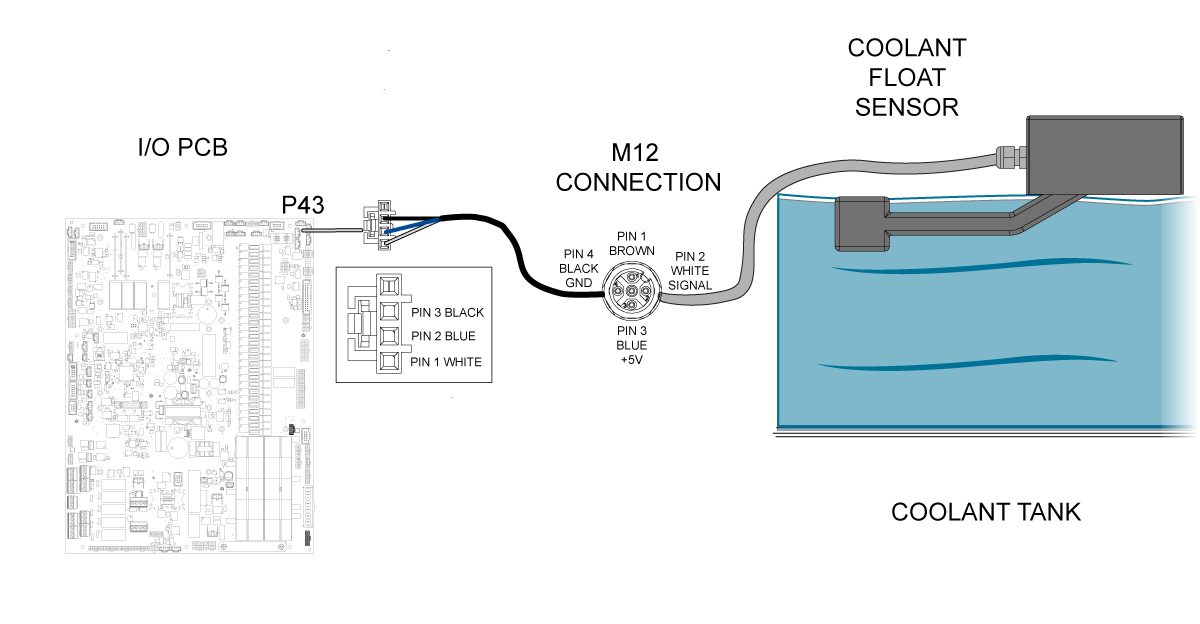
-coolant---system---troubleshooting-guide/TG_Coolant_Level_Intro.jpg)
-coolant---system---troubleshooting-guide/TG_Coolant_Level_Up_and_Down.png)