-
μηχανήματα
-
Κάθετες φρέζες
Κάθετες φρέζες
-
Λύσεις πολλαπλών αξόνων
Λύσεις πολλαπλών αξόνων
-
Τόρνοι
Τόρνοι
-
Οριζόντιες φρέζες
Οριζόντιες φρέζες
-
Περιστροφικά συστήματα και διαιρέτες
Περιστροφικά συστήματα και διαιρέτες
-
Συστήματα Αυτοματισμού
Συστήματα Αυτοματισμού
-
Επιτραπέζια μηχανήματα
Επιτραπέζια μηχανήματα
-
Εξοπλισμός μηχανουργείου
Εξοπλισμός μηχανουργείου
-
Μηχανήματα κατασκευών
Μηχανήματα κατασκευών
ΕΡΓΑΛΕΙΑ ΜΗΧΑΝΟΥΡΓΕΙΟΥΘΕΛΕΤΕ ΝΑ ΜΙΛΗΣΕΤΕ ΜΕ ΚΑΠΟΙΟΝ;Ένα Εργοστασιακό Παράρτημα Haas (HFO) είναι διαθέσιμο να απαντήσει στις ερωτήσεις σας και να παράσχει πληροφορίες για τις καλύτερες επιλογές σας.
CONTACT YOUR DISTRIBUTOR > -
Κάθετες φρέζες
-
Επιλογές
-
 Άτρακτοι
Άτρακτοι
Άτρακτοι -
 Μηχανισμοί αλλαγής εργαλείων
Μηχανισμοί αλλαγής εργαλείων
Μηχανισμοί αλλαγής εργαλείων -
 4ος- | 5ος άξονας
4ος- | 5ος άξονας
4ος- | 5ος άξονας -
 Εργαλειοφορείς και περιστρεφόμενα εργαλεία
Εργαλειοφορείς και περιστρεφόμενα εργαλεία
Εργαλειοφορείς και περιστρεφόμενα εργαλεία -
 Λήψη μετρήσεων
Λήψη μετρήσεων
Λήψη μετρήσεων -
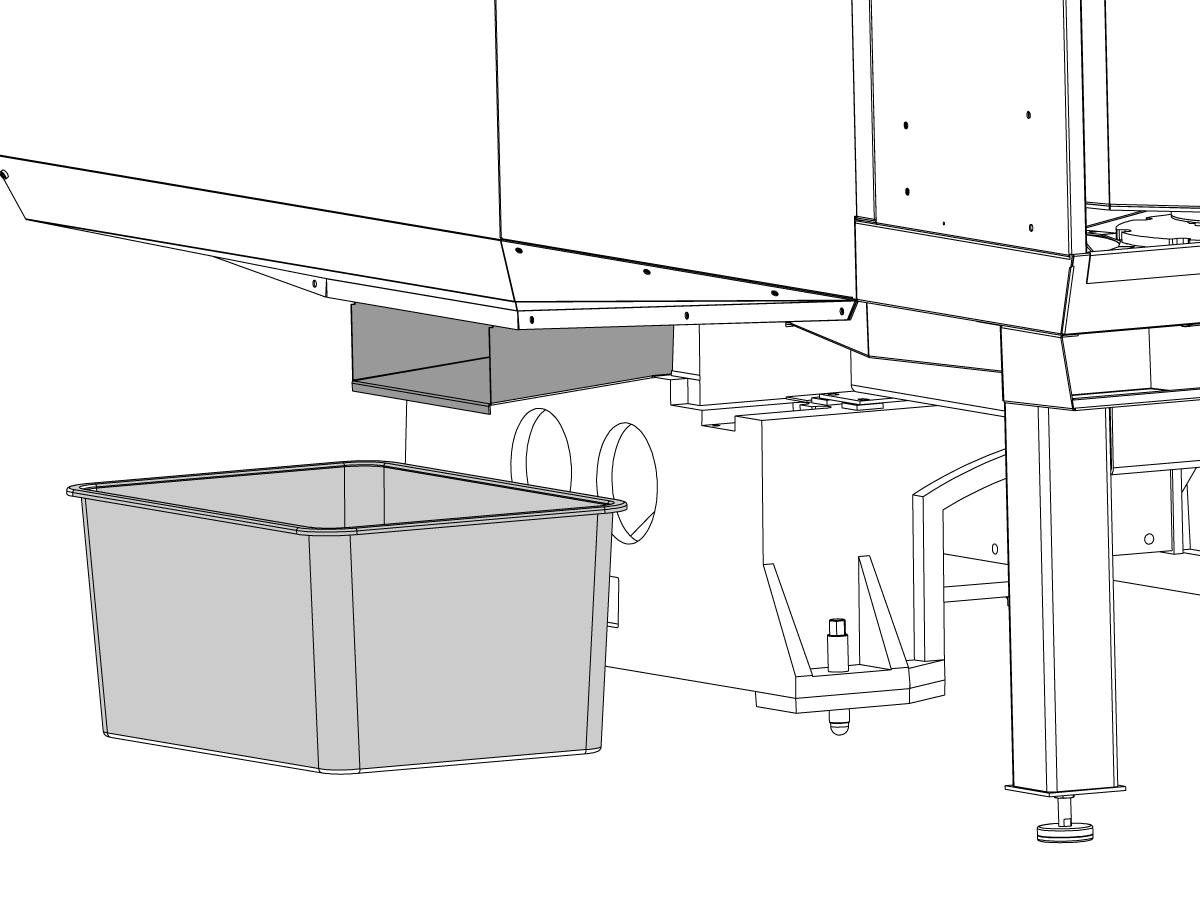
 Διαχείριση ρινισμάτων και ψυκτικού υγρού
Διαχείριση ρινισμάτων και ψυκτικού υγρού
Διαχείριση ρινισμάτων και ψυκτικού υγρού -
 Ο πίνακας ελέγχου Haas
Ο πίνακας ελέγχου Haas
Ο πίνακας ελέγχου Haas -
 Επιλογές προϊόντος
Επιλογές προϊόντος
Επιλογές προϊόντος -
 Εργαλεία και Στερέωση σε ιδιοσυσκευή
Εργαλεία και Στερέωση σε ιδιοσυσκευή
Εργαλεία και Στερέωση σε ιδιοσυσκευή -
 Διάταξη σύσφιξης κατεργαζόμενου τεμαχίου
Διάταξη σύσφιξης κατεργαζόμενου τεμαχίου
Διάταξη σύσφιξης κατεργαζόμενου τεμαχίου -
 Λύσεις 5 αξόνων
Λύσεις 5 αξόνων
Λύσεις 5 αξόνων -
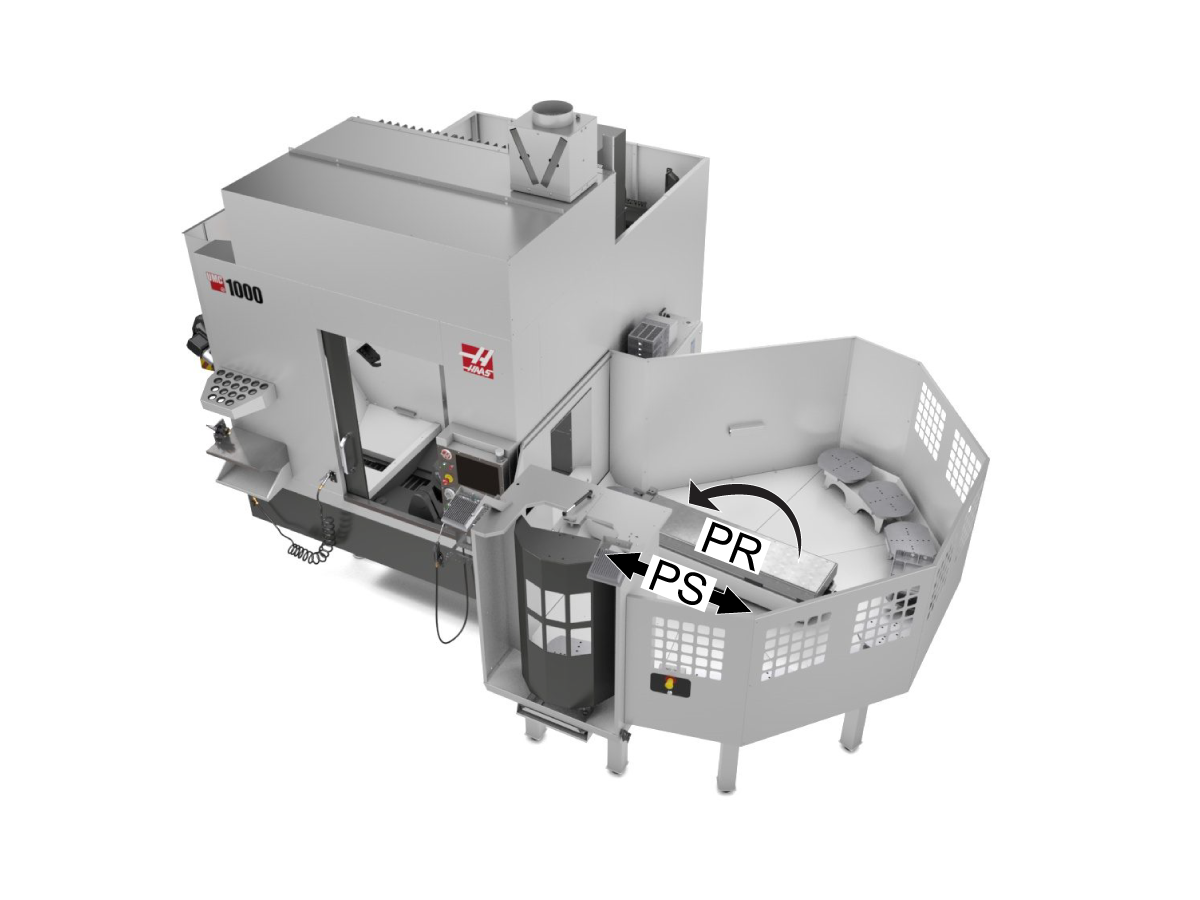
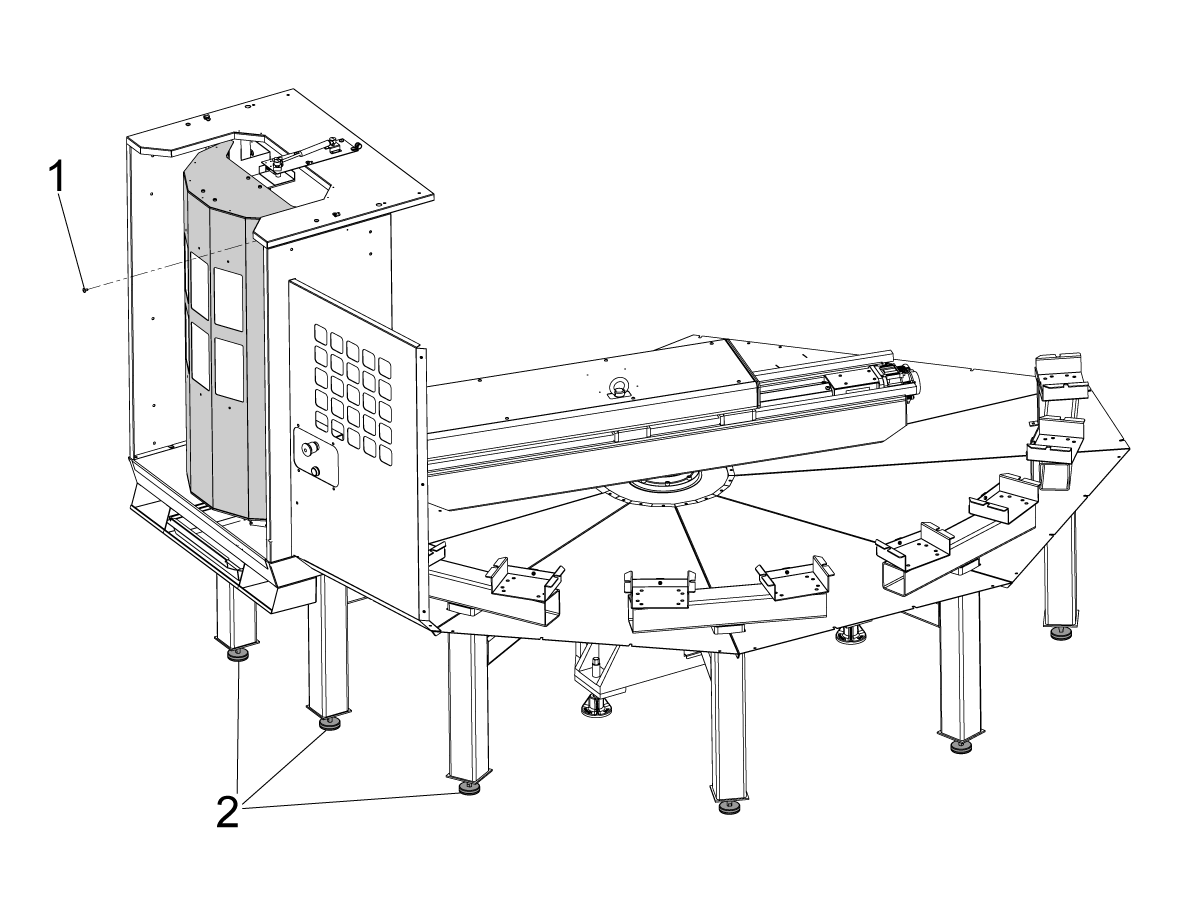
 Αυτοματισμός
Αυτοματισμός
Αυτοματισμός
ΕΡΓΑΛΕΙΑ ΜΗΧΑΝΟΥΡΓΕΙΟΥΘΕΛΕΤΕ ΝΑ ΜΙΛΗΣΕΤΕ ΜΕ ΚΑΠΟΙΟΝ;Ένα Εργοστασιακό Παράρτημα Haas (HFO) είναι διαθέσιμο να απαντήσει στις ερωτήσεις σας και να παράσχει πληροφορίες για τις καλύτερες επιλογές σας.
CONTACT YOUR DISTRIBUTOR > -
-
Why Haas
Ανακαλύψτε τη διαφορετικότητα της Haas
-
Service
Καλωσορίσατε στο Haas Service
- Βίντεο