×

Iskalni rezultati

Web Pages

Images

    • <
    • 1
    • >
  • stroji
    • Vertikalni rezkarji Haas
      Vertikalni rezkalni centri
      • Vertikalni rezkalni centri
      • VF Serija
      • Univerzalni stroji
      • Serija VF
      • VMC z menjavo palet
      • Stroji Mini Mill
      • Kalupni stroji
      • Serija Drill/ Tap/ Mill
      • Rezkarji Toolroom Mill
      • Kompaktni rezkarji
      • Serija Gantry
      • Vertikalni rezkar/stružnica
      • Izjemno velik vertikalni obdelovalni center (VMC)
      • Rezkarji z dvema stebroma
      • Namizni rezkar
      • Avtomatska naprava za nalaganje obdelovancev
    • Product Image
      Večosne rešitve
      • Večosne rešitve
      • 5-osni rezkarji
      • Stružnice z Y-osjo
    • Stružnice Haas
      Stružnice
      • Stružnice
      • Serija ST
      • Dvojno-vreteno
      • Stružnice Toolroom Lathe
      • Stružnica Chucker
      • Podajalec palic Haas V2
      • Avtomatska strežna naprava stružnice
    • Horizontalni rezkarji Haas
      Horizontalni rezkalni centri
      • Horizontalni rezkalni centri
      • 50-konusni
      • 40-konusni
    • Vrtljive mize in indekserji Haas
      Rotacijske mize in indekserji
      • Rotacijske mize in indekserji
      • Vrtljive mize
      • Indekserji
      • 5-osne vrtljive mize
      • Zelo velike vrtljive mize
    • Product Image
      Avtomatizirani sistemi
      • Avtomatizirani sistemi
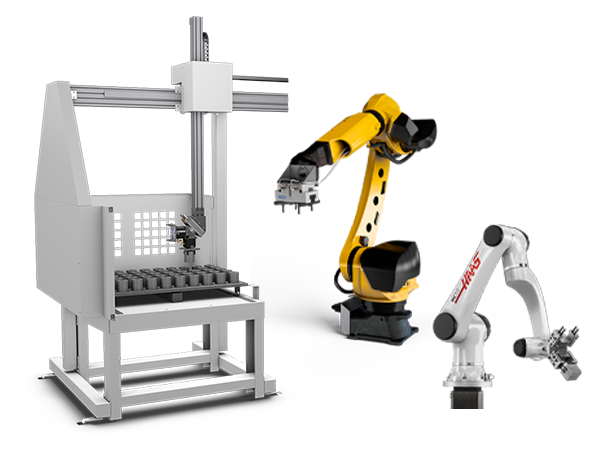
      • Robotski sistemi
      • Avtomatske naprave za nalaganje kosov
      • Sistemi z zalogovniki palet
      • PODAJALNIK PALIC HAAS
      • Models
    • HITRE POVEZAVE Posebna serija  Posebna serija 
      KARIERA V PODJETJU HAAS KARIERA V PODJETJU HAAS SESTAVI IN PREVERI CENO SESTAVI IN PREVERI CENO CENIK CENIK KAJ JE NOVEGA? KAJ JE NOVEGA? VAŠ PRVI CNC VAŠ PRVI CNC HAAS SIX PACK HAAS SIX PACK
      ORODJA ZA NAKUPOVANJE
      • Sestavi in preveri ceno Haasa
      • Cenik
      • Razpoložljiv inventar
      • Financiranje CNCA
      SE ŽELITE S KOM POGOVORITI?

      Tovarniška izpostava Haas (HFO) lahko odgovori na vaša vprašanja in vam predstavi vaše najboljše možnosti.

      CONTACT YOUR DISTRIBUTOR >
  • Možnosti
    • Product Image
      Vretena
      • Vretena
    • Product Image
      Menjalci orodja
      • Menjalci orodja
    • Product Image
      4. | 5. os
      • 4. | 5. os
    • Product Image
      Revolverji in gnana orodja
      • Revolverji in gnana orodja
    • Product Image
      Merjenje s sondo
      • Merjenje s sondo
    • Obvladovanje odrezkov in emulzije Haas
      Obvladovanje odrezkov in emulzije
      • Obvladovanje odrezkov in emulzije
    • Krmilje Haas
      Krmilje Haas
      • Krmilje Haas
    • Product Image
      Opcije izdelka
      • Opcije izdelka
    • Product Image
      Orodje in vpenjanje
      • Orodje in vpenjanje
    • Product Image
      Vpenjanje obdelovanca
      • Vpenjanje obdelovanca
    • Product Image
      5-osne rešitve
      • 5-osne rešitve
      • 5 Easy Steps to 5-Axis
    • Product Image
      Avtomatizacija
      • Avtomatizacija
    • HITRE POVEZAVE Posebna serija  Posebna serija 
      KARIERA V PODJETJU HAAS KARIERA V PODJETJU HAAS SESTAVI IN PREVERI CENO SESTAVI IN PREVERI CENO CENIK CENIK KAJ JE NOVEGA? KAJ JE NOVEGA? VAŠ PRVI CNC VAŠ PRVI CNC HAAS SIX PACK HAAS SIX PACK
      ORODJA ZA NAKUPOVANJE
      • Sestavi in preveri ceno Haasa
      • Cenik
      • Razpoložljiv inventar
      • Financiranje CNCA
      SE ŽELITE S KOM POGOVORITI?

      Tovarniška izpostava Haas (HFO) lahko odgovori na vaša vprašanja in vam predstavi vaše najboljše možnosti.

      CONTACT YOUR DISTRIBUTOR >
  • Why Haas
      Spoznajte Haasovo razliko
      Zakaj Haas? MyHaas Skupnost za izobraževanje Industrija 4.0 Certifikat Haas Pričevanja strank
  • Servis
      Dobrodošli v storitvah Haas
      DOMAČA STRAN ZA SERVIS Priročniki za operaterja Postopki z navodili Navodila za odpravljanje napak preventivno vzdrževanje Deli Haas Strojno orodje Haas Videoposnetki
  • Videoposnetki
  • MyHaas – eno mesto za vse

    • Compare Quotes
      • Compare Quotes

    • O MyHaas
      • O MyHaas

    • CNC certifikacijski program Haas
      • CNC certifikacijski program Haas

    • Haas CNC Certification Program-Redirect
      • Haas CNC Certification Program-Redirect

    • CNC certifikacijski program Haas
      • CNC certifikacijski program Haas

    • Haas Learning Resources
      • Haas Learning Resources

    • Haas Global Learning Resources
      • Haas Global Learning Resources

    • MyHaas App Form
      • MyHaas App Form
    • HITRE POVEZAVE Posebna serija  Posebna serija 
      KARIERA V PODJETJU HAAS KARIERA V PODJETJU HAAS SESTAVI IN PREVERI CENO SESTAVI IN PREVERI CENO CENIK CENIK KAJ JE NOVEGA? KAJ JE NOVEGA? VAŠ PRVI CNC VAŠ PRVI CNC HAAS SIX PACK HAAS SIX PACK
      ORODJA ZA NAKUPOVANJE
      • Sestavi in preveri ceno Haasa
      • Cenik
      • Razpoložljiv inventar
      • Financiranje CNCA
      SE ŽELITE S KOM POGOVORITI?

      Tovarniška izpostava Haas (HFO) lahko odgovori na vaša vprašanja in vam predstavi vaše najboljše možnosti.

      CONTACT YOUR DISTRIBUTOR >

    • HFO Slovenia
      • HFO Slovenia
      • O nas
      • Servis
      • Usposabljanje
      • Financiranje
      • Dogodki
      • Showroom centri
      • Kontaktirajte nas
      • Pričevanja strank
    • HITRE POVEZAVE Posebna serija  Posebna serija 
      KARIERA V PODJETJU HAAS KARIERA V PODJETJU HAAS SESTAVI IN PREVERI CENO SESTAVI IN PREVERI CENO CENIK CENIK KAJ JE NOVEGA? KAJ JE NOVEGA? VAŠ PRVI CNC VAŠ PRVI CNC HAAS SIX PACK HAAS SIX PACK
      ORODJA ZA NAKUPOVANJE
      • Sestavi in preveri ceno Haasa
      • Cenik
      • Razpoložljiv inventar
      • Financiranje CNCA
      SE ŽELITE S KOM POGOVORITI?

      Tovarniška izpostava Haas (HFO) lahko odgovori na vaša vprašanja in vam predstavi vaše najboljše možnosti.

      CONTACT YOUR DISTRIBUTOR >
  • Kontaktirajte nas

My Cart
MyHaas Dobrodošli,
!
Haas Tooling Zgodovina naročil gostov MyHaas/HaasConnect Vpis Registrirajte Haas Tooling Moj račun Order History Return History MyHaas/HaasConnect Izpis Dobrodošli, Moji stroji Zadnja dejavnost Moje ponudbe Moj račun Moji uporabniki Izpis
Poiščite prodajalca
  1. Izberite jezik
    1. English
    2. Deutsch
    3. Español
    4. Français
    5. Italiano
    6. Português
    7. Český
    8. Dansk
    9. Nederlands
    10. Magyar
    11. Polski
    12. Svenska
    13. Русский
    14. Türkçe
    15. 中文
    16. Suomi
    17. Norsk
    18. الإنجليزية
    19. български
    20. Hrvatski
    21. Ελληνικά
    22. Română
    23. Slovenský
    24. Slovenščina
    25. 한국어
    26. 日本語
Search
×

Iskalni rezultati

Web Pages

Images

    • <
    • 1
    • >

FANUC Dual Check Safety Setup

Priročnik za upravljavca robotskega paketa Haas


  • 1 – HRP – Uvod
  • Mill Installation
  • Lathe Installation
  • 2 – HRP – Pravne informacije
  • 3 – HRP – Varnost
  • 4 – HRP-1 – Montaža
  • 5 – HRP-2 – Montaža
  • 6 – HRP-3 – Montaža
  • 7 – HRP - Namestitev ograje
  • 8 – HRP - Nastavitev sistema DCS FANUC
  • 9 – Delovanje HRP
  • 10 – HRP – Vzdrževanje
  • 11 – HRP - Odpravljanje težav

Go To :

  • 8.1 Dual Check Safety
Recently Updated

Haas Robot – FANUC Dual Check Safety (DCS) – Setup


Introduction

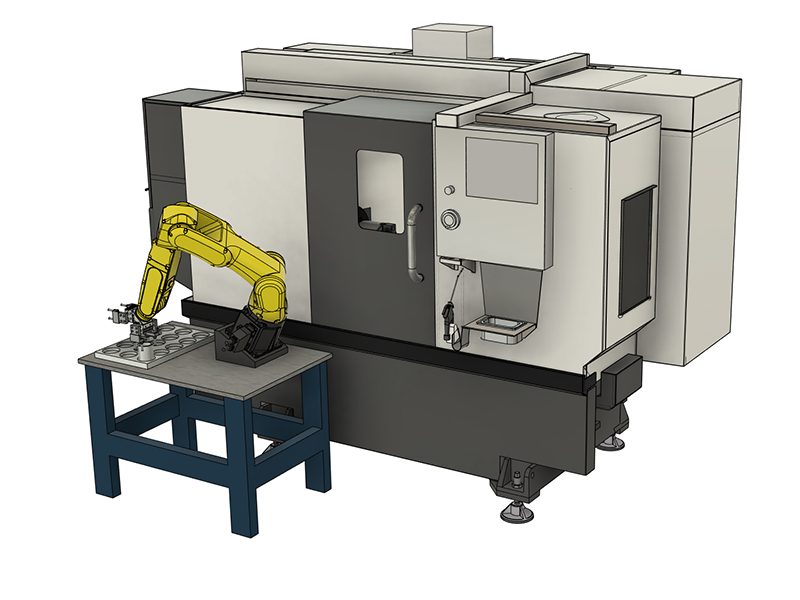
Each Haas Robot is provided with FANUC's DCS System. This allows the user to define speed and positional limits to the robot. If the robot goes outside of these limits, DCS will stop the robot and remove power to the motors.

This guide will show how to configure a simple Cartesian Positon Check limits for your robot. The Cartesian Position Check Function allows a user to define a work zone and a restricted zone for the robot. If the robot exits a defined work zone then DCS will stop the robot. If any part of the robot violates a restricted zone, then DCS will stop the robot. The user must jog the robot back to it's work zone, or out of the restricted zone at a reduced speed or the robot will alarm out.

The Robot Package comes pre-configured with Cartesian Speed Check limits for RUN and SETUP mode.

Note: Verify proper setup of the DCS zones at the time of robot installation and every 6 months. It should also be verified after a new job has been set up.

These instructions require that your robot be aligned with your fence. 

Note: If the robot was not aligned with the fence, the work zone will be smaller than expected.

Measuring Safe Zone Size

1

The work zone size will be referenced and measured from the center of J2 axis of the robot. One surface and one edge from J2 we will measure from in order to get the center of J2. If using the flat from surface A, we will add 4.5in or 114mm to our measurements. If using surface B, we will add 2.5in or 63.5mm to our measurements.

Turn on machine and robot, make sure both are connected to each other. Jog the J1 robot axis so that it is at 90, 0 or -90 degrees. Your robot surfaces A and B should now be parallel to the fence and machine door.

2

Cut out the XY coordinate system and place it on your robot table to help visualize where we are taking measurements in relation to the coordinate system.

The coordinate system for your application will depend on how your robot is positioned on the table. The side of the robot base with power cables coming out is the X- direction. The battery cover on the base of the robot is the Y+ direction.

Note: This coordinate system is considered to be the world frame. World frame in this application is rotated along X by -30 degrees because of the way the robot base is mounted on the tilt mount. Later in the steps we will be assigning a user frame for this safe zone that will have a simple 30 degree X rotation which will cancel out the physical tilt of the base.

Align the coordinate system reference with the XY direction of your robot setup.

3

Use the table provided to fill in your measurements.

Note: All dimensions will need to be converted to millimeters.

Make sure to measure the distances with the measuring tape parallel to the axis on the coordinate system print out.

Note: There will be one positive and one negative value for X, Y and Z.

*The Z distances can be adjusted for more clearance above and below the robot. This value is measured from the center of J2.

4

Warning: The following dimensions are an example and should not be used for DCS Setup.

Measure the distance from the center of J2 to the fence on opposite of the machine. This is the positive X-direction when referencing the coordinate system print out.

Example: The distance of the positive X-direction for point 1 is 24.5” this is calculated as:

  • The edge of J2 to the center of J2 = +4.5”
  • The edge of J2 to the fence = +20.0”

Enter the total distance into the table corresponding to the direction of measurement. The X-axis in the positive direction was measured. The value is entered into the table in the X row and Point 1 column. The dimension will have a positive value.

5

Measure the distance from the center of J2 axis to the fence. This is the negative Y-direction when referencing the coordinate system print out.

Example: The distance of the negative Y-direction for point 1 is -34.5”, this is calculated as:

  • The edge of J2 to the center of J2 = -2.5”
  • The edge of J2 to the fence = -32.0”

Enter the total distance into the table corresponding to the direction of measurement. The Y-axis in the negative direction was measured. The value is entered into the table in the Y row and Point 1 column. The dimension will have a negative value.

6

Measure the distance from the center of J2 to the inside of the machine past the workholding. This is the negative X-direction when referencing the coordinate system print out.

Example: The distance of the negative X-direction for point 2 is -39.5” this is calculated as:

  • The edge of J2 to the center of J2 = -4.5”
  • The edge of J2 to the face of the closed door = -11.0”
  • The face of the open door to past the workholding = -24.0"

Enter the total distance into the table corresponding to the direction of measurement. The X-axis in the negative direction was measured. The value is entered into the table in the X row and Point 2 column. The dimension will have a negative value.

Note: If this safe zone measurement is incorrectly calculated. The safe zone may be placed too close to work holding. This value can be adjusted to add more work space inside the machine.

7

Measure the distance from the center of J2 axis to the edge of the door opening. This is the positive Y-direction when referencing the coordinate system print out.

Example: The distance of the positive Y-direction for point 2 is 28.5”, this is calculated as:

  • The edge of J2 to the center of J2 = 2.5”
  • The edge of J2 to the edge of the door opening = 26.0”

Enter the total distance into the table corresponding to the direction of measurement. In the case above, the Y+ axis was measured, so the value would go into point 2 with a positive value.

8

The Z value for each point is in the table. If more ceiling work envelope is needed, the positive Z distance can be increased. If more floor work envelope is needed, the negative Z distance can be increased.

After taking measurements, double check values. The values are creating a box around the robot that is referenced from the center of J2.

DCS User Frame Setup

1

To setup a DCS User Frame, a computer with internet access will need to be connected to the Robot Control Box with a RJ-45 cable. Open the front door of your robot controller and unplug the RJ-45 cable from Port 1 [1]. Plug in a new RJ-45 cable that is connected to a computer that has internet access. Follow the video above to setup the adapter settings on your computer to match the robot IP address.

Note: When finished setting up the DCS User frame, disconnect the RJ-45 cable from the computer and robot and plug the RJ-45 back into the Port 1.

2

Login to the HMI Jogging Pendant from your web browser.

Navigate to the User Frame Setup view.

Click on Frame 9 then click DETAIL.


3

For Robot Package 1 Only

Select W and enter the value of 30.0 then hit enter on your keyboard.

This is where we are adding a 30 degree X rotation to the world frame to cancel out the tilt of the robot base.

4

Navigate to DCS Menu.

Enable the pendant by hitting the ON/OFF button on the top right.

Enter user frame section (10).

Select the second zero in the list under No. column and press 9. Confirmation question will show at the bottom, press YES. Change that value to 9 after confirmation.

You should see W populate with the same value from step 2.

Go back to DCS menu.

DCS Cartesian Position Check Setup

1

Go into Cart. Position Check (5).

Go into No. 1.

Enable the position check No. 1 by selecting then pressing [CHOICE] at the bottom.

Change the Method type to Work Zone (Diagonal) by clicking the row then selecting [CHOICE] at the bottom.

Target Model 1 should say Robot Model, Target model 2 and 3 should be disabled.

Set Base Frame: User Frame: to 9 by selecting then entering 9.

2

In Point 1 and 2, enter in the values that were recorded from earlier in the guide. This is where we define the two points for the work space diagonal box.

For Stop Type, click the row then select [CHOICE] at the bottom and change to Speed Check(1).

Make sure Stop Prediction is Yes.

Click on <DETAIL> under Speed Check then hit ENTER on your keyboard.

Set Limit 1 to 20.0, Delay Time to 0, and Permissable distance to 0.0, Speed Control to DISABLE.

Press PREV 3 times to get back to the Main DCS screen.

3

Now we will apply the all the changes we made in the DCS menu. Any DCS section that was changed since last APPLY will show a RED CHGD next to it. Press APPLY at the bottom.

Enter 1111 for the Master Code.

This will take you to another menu that will show you the changes made in the DCS menu since last apply. Press OK if all changes are correct.

Close the HMI Pendant Window.

Cycle power on the robot controller by turning the power switch OFF, waiting 5 seconds then back ON.

Setup is complete. There is now a work zone setup around the robot. If any part of the robot leaves the work zone at a speed greater than 20mm/s, it will alarm. If this alarm is triggered, it is possible to reset the alarm and jog back into the zone at a rate less than 20mm/s. The next section covers how to visualize the zone that was just created.

DCS Cartesian Position Visualization

1

With the Work Zone setup, we want a way to visualize the zone in relation to the robot.

Access the Jogging HMI Pendant and navigate to MENU > NEXT > 4D Graphics.

You will see the robot virtually on the HMI pendant along with its current orientation.

To see the DCS zone, click on [VISIBLE] at the bottom bar, if it is not there, press the > arrow on the bar.

2

A new menu will display in the top left of the 4D display. Click on 4D DCS Display, it will turn a shade of blue to signify that it is ON. You will see a box appear if your DCS zone is enabled and setup.

Verify that the work zone that appears is surrounding your robot. If the zone is a shade of red, that means a part of the robot is outside of the zone. If the zone is green that means your robot is within the zone.

This display will update in real time, you can have this open on your laptop/computer while you jog the robot with the HAAS machine.

This zone can be modified with the Point 1 and Point 2 XYZ positions from step. It is OK if the zone is angled in the 4D display, because the robot base is angled in real world (in our application).

DCS Cartesian Position Verification

1

Note: When finished setting up the DCS User frame, disconnect the RJ-45 cable from the computer and robot and plug the RJ-45 back into the Port 1.

Verify the DCS zone by jogging the robot in the positive Y-direction to a safe location out of the DCS zone and check if the machine alarms.

If it does, jog back into the DCS zone.

Note: To jog back into the DCS zone without alarming the machine, lower the jogging feedrate.

Povratne informacije
POIŠČITE DISTRIBUTERJA
Povratne informacije
Haas Logo

美元价格不包括关税、报关费用、保险费、增值税及运费。
USD prices DO NOT include customs duty, customs fees, insurance, VAT, or freight.

人民币价格包含关税、报关费用、货运保险和增值税, 但不包括运费。
CNY prices include customs duty, customs fees, insurance, and VAT. DOES NOT include freight.

HAAS dobavljena cena

Ta cena vključuje stroške pošiljanja, izvozne in uvozne dajatve ter vse druge stroške, ki nastanejo med pošiljanjem na lokacijo v Franciji, dogovorjeno z vami kot kupcem. Za dostavo CNC produkta Haas se ne sme zaračunati nobenih drugih obveznih stroškov.

BODITE OBVEŠČENI O NAJNOVEJŠIH NASVETIH IN TEHNOLOGIJI PODJETJA HAAS…

Prijavite se zdaj!   

HAAS TOOLING ACCEPTS THE FOLLOWING:

  • Servis in podpora
  • Lastniki
  • Zahteva za servis
  • Priročniki za operaterja
  • Deli Haas
  • Zahteva za popravilo delilnika
  • Navodila za prednamestitev
  • Orodja za nakupovanje
  • Sestavi in preveri ceno novega Haasa
  • Razpoložljiv inventar
  • Cenik Haas
  • Financiranje CNCA
  • O podjetju Haas
  • Zaposlitev
  • Certifikati in varnost
  • Kontaktirajte nas
  • Zgodovina
  • Pogoji in določbe
  • Pogoji in določbe orodja Haas
  • Zasebnost
  • Garancija
  • Skupnost Haas
  • Certifikacijski program Haas
  • Motošport Haas
  • Fundacija Gena Haasa
  • Haas skupnost za tehnično izobraževanje
  • Dogodki
  • Pridružite se pogovoru
  • Facebook
  • Twitter
  • Flickr
  • YouTube
  • LinkedIn
  • Instagram
  • TikTok
© 2022 Haas Automation, Inc – Orodja CNC stroja

2800 Sturgis Rd., Oxnard, CA 93030 / Toll Free: 800-331-6746
Phone: 805-278-1800 / Fax: 805-278-2255

Obvestilo o piškotkih

Za izboljšanje vaše uporabniške izkušnje uporabljamo piškotke. Naše obvestilo o piškotkih opisuje, katere piškotke uporabljamo, zakaj jih uporabljamo in kako lahko najdete več informacij o njih. Potrdite, da nam dovolite uporabo analitičnih piškotkov. Če nam ne daste dovoljenja, lahko še naprej uporabljate naše spletno mesto, vendar z okrnjeno uporabniško izkušnjo.

Upravljaj nastavitve

Obvestilo o piškotkih

Za izboljšanje vaše uporabniške izkušnje uporabljamo piškotke. Naše obvestilo o piškotkih opisuje, katere piškotke uporabljamo, zakaj jih uporabljamo in kako lahko najdete več informacij o njih. Potrdite, da nam dovolite uporabo analitičnih piškotkov. Če nam ne daste dovoljenja, lahko še naprej uporabljate naše spletno mesto, vendar z okrnjeno uporabniško izkušnjo.

Functional Cookies

Analytics Cookies