

/2026-04-VOP-SquareComponent.jpg/_jcr_content/renditions/cq5dam.thumbnail.319.319.png) 增值选件套
增值选件套
 主轴
主轴
 刀库
刀库
 第 4 轴 |第 5 轴
 刀塔和动力刀
 探测
探测
 切屑和冷却液管理
 Haas 控制系统
 产品选项
产品选项
 刀具和夹具
刀具和夹具
 工件夹具
工件夹具
 5 轴解决方案
 自动化
自动化

Your document is ready for download, please click below to download your document.
Download DocumentError processing this document, please try again or 联系我们.
Please wait while your document is being loaded.

AD0688
Your document is ready for download, please click below to download your document.
Download DocumentError processing this document, please try again or 联系我们.
Please wait while your document is being loaded.
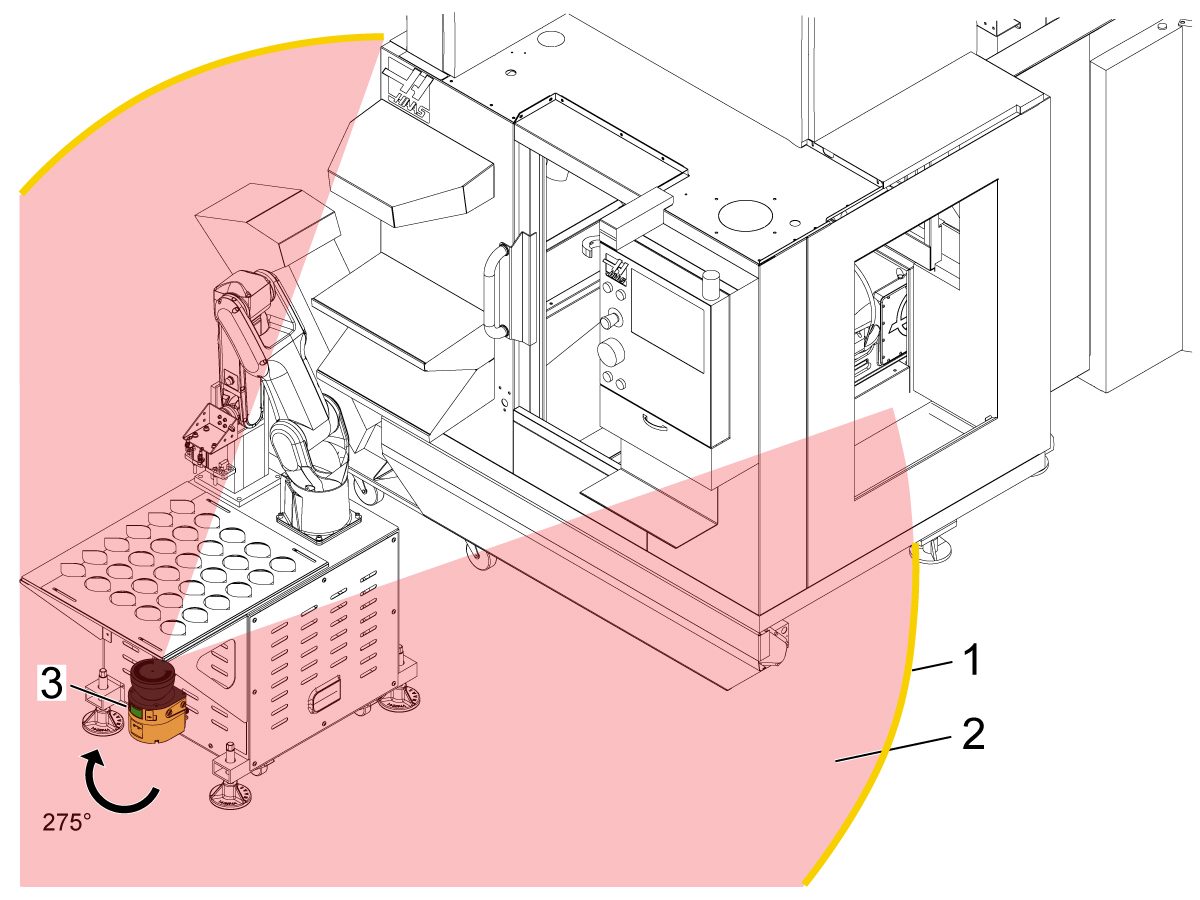
可以使用安全区域扫描枪代替联锁围栏,以保护用户免受机器人的伤害。
此过程将展示如何正确设置受保护区域并配置区域扫描仪。
机床要求:
软件要求:
此程序适用于以下维修套件:
注意:将机器人或任何区域扫描仪保护领域内的内容重新放置后,需要对区域扫描仪进行重新编程。
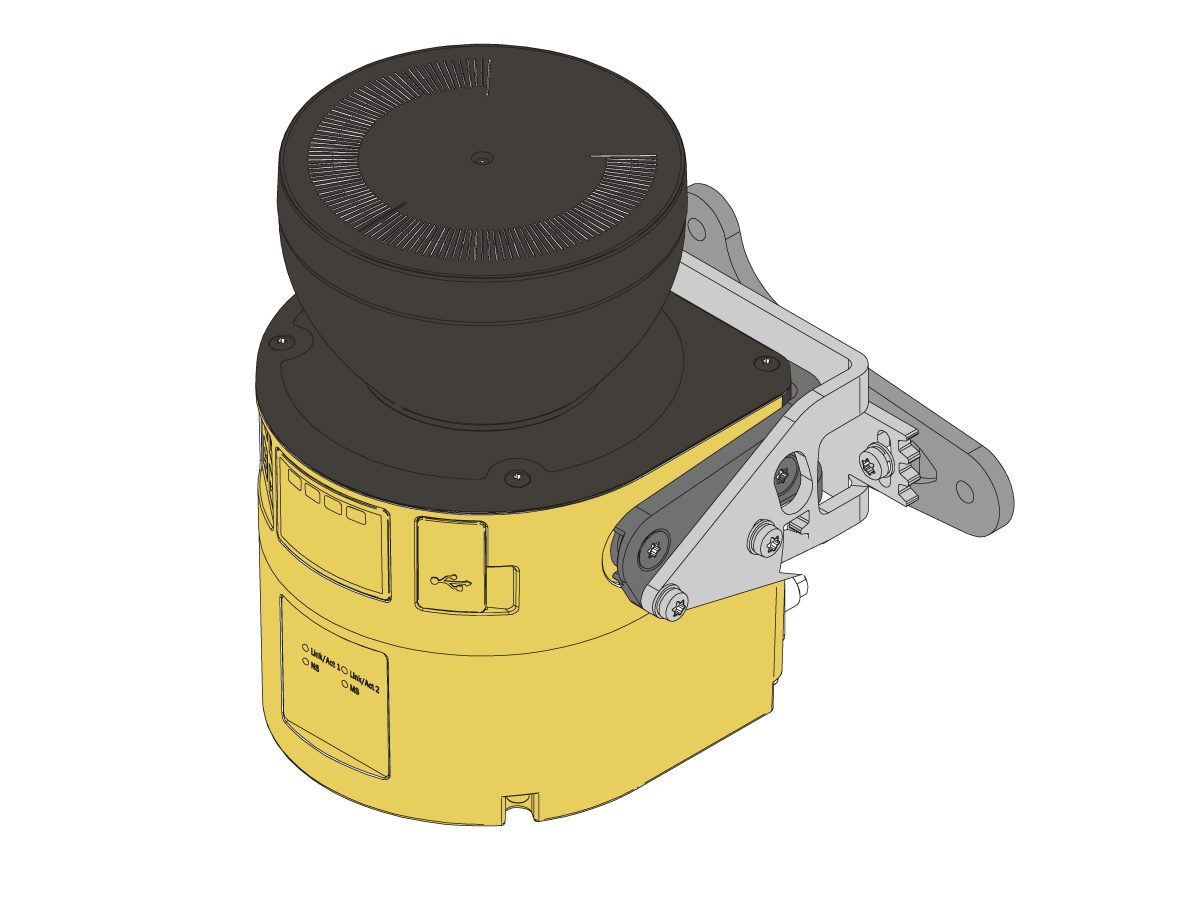
确保区域扫描仪已安装至所需位置,可查看其最大范围 ~275°。
重要事项:如果尚未安装区域扫描仪, 请参阅区域扫描仪 - 安装 - AD0687 程序以获取更多信息。
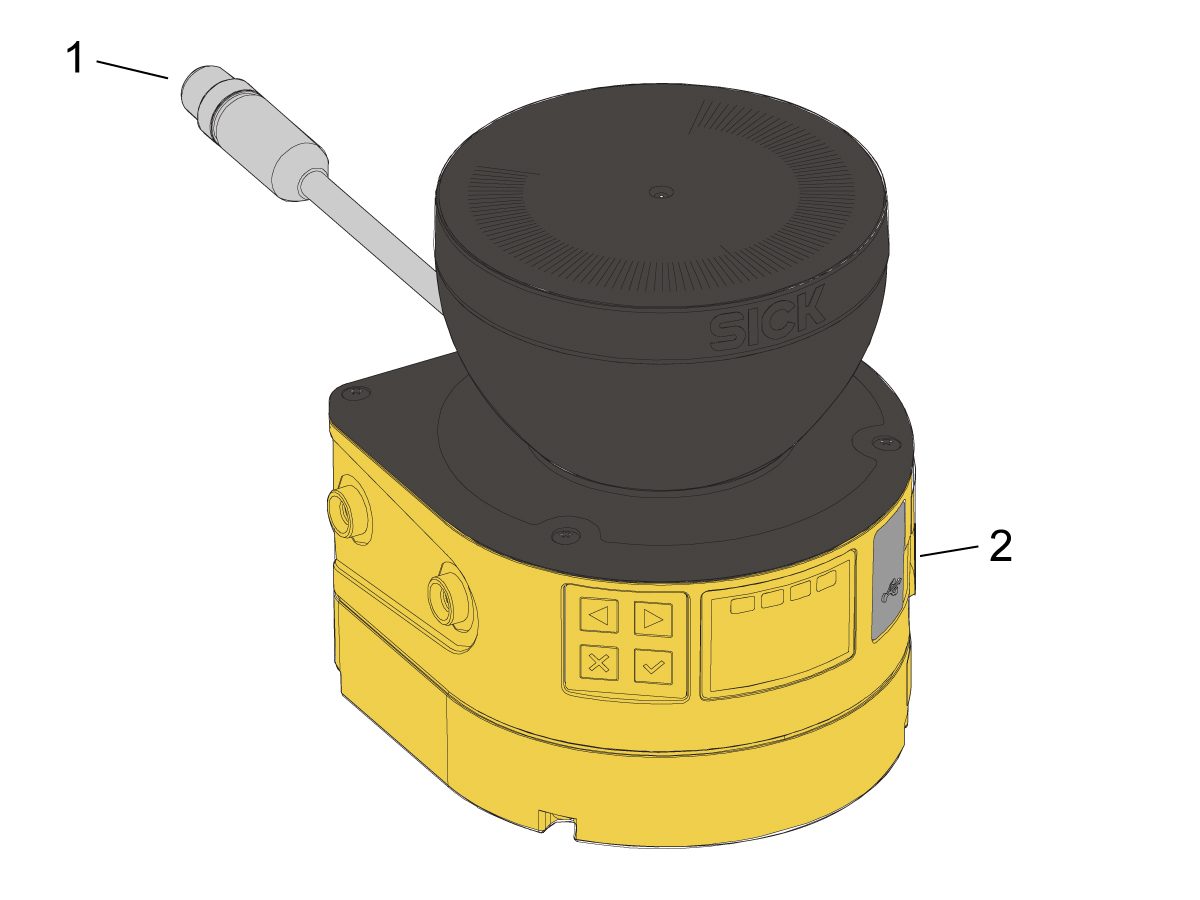
将区域扫描仪插入电源 - 如果是独立区域扫描仪,则为壁,如果是集成区域扫描仪 ,则为机床的控制箱。
将微型 USB 电缆从区域扫描仪插入区域扫描仪。
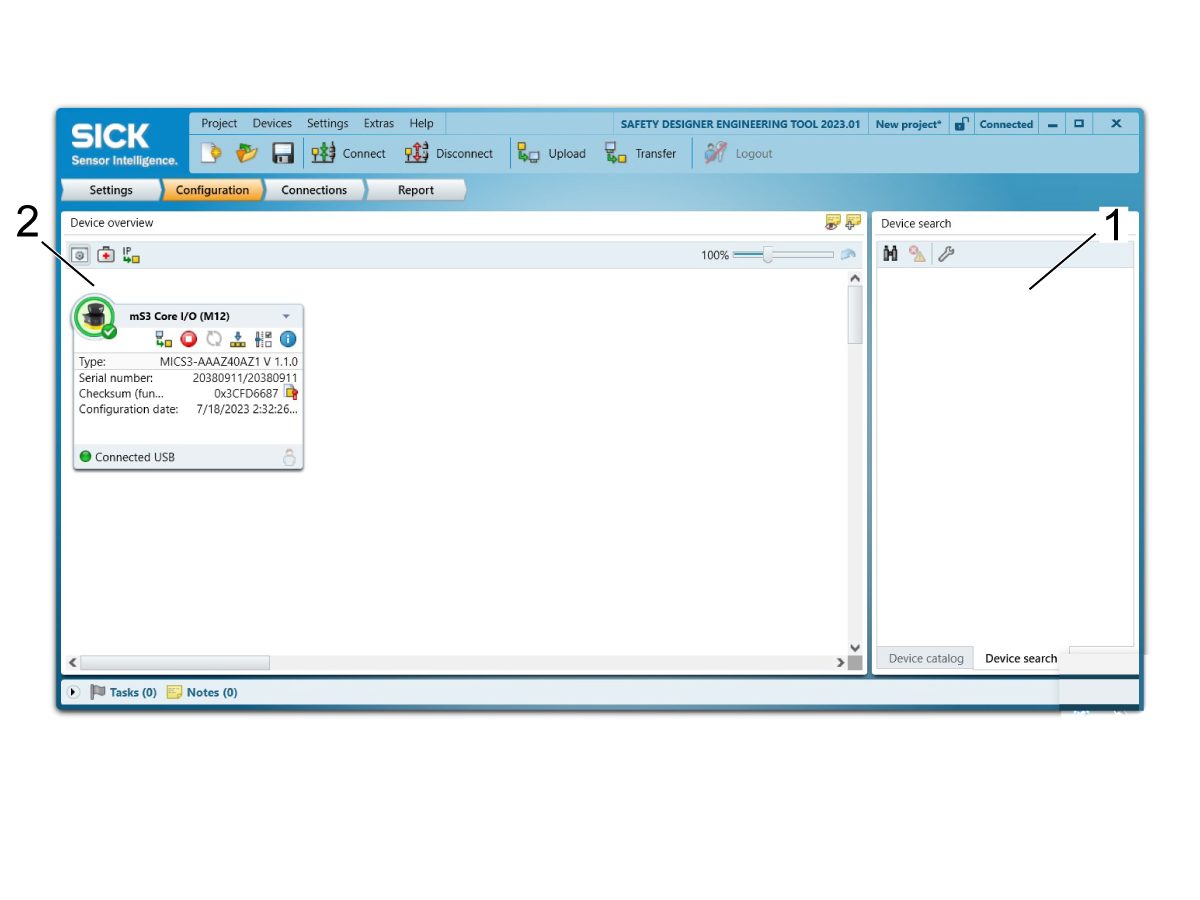
使用安全设计器,单击 新项目 .
单击连接 .
安全设计器与区域扫描仪建立连接后,已连接区域扫描仪的图标应在设备搜索 [1].下方的右侧弹出。双击图标进行连接。
现在,已连接区域扫描仪的图标应在设备概述 [2] 下方左侧弹出。双击图标以打开设备窗口。
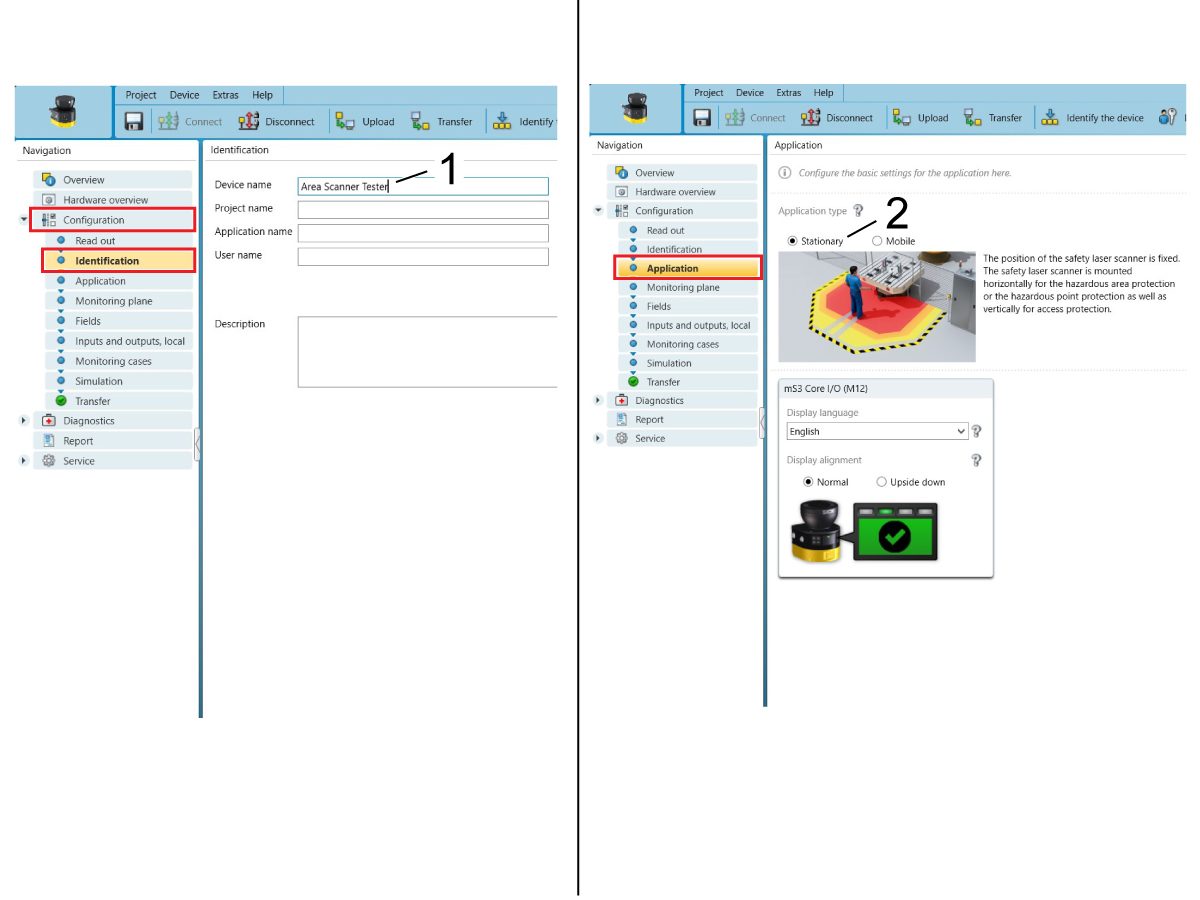
单击左侧导航菜单上的配置 。
在“配置”下,单击“识别”。 如果需要,在此处插入区域扫描仪的名称 [1]。
单击“应用”以确保将应用类型设置为“固定”[2]。

单击 监控平面 以设置 2D 水平或垂直监控平面 [1]。在这种情况下,水平监控平面是加工应用最常见的监控。
注意: 如果使用垂直监控平面,则需要参考轮廓监控 [2]。有关此方面的更多信息,请参阅 SICK 服务手册上的第 ** 页。
对象分辨率 [3] 用于设置区域扫描仪可以检测的最小尺寸。使用水平监控平面,对象分辨率应设置在 70 毫米左右。使用垂直监控平面,对象分辨率应设置在 150 毫米左右。
多次采样 [4] 用于 设置区域扫描者在反应前必须扫描物体的次数。更高的多次采样减少了检测到不需要的东西(如昆虫、灰尘等)的概率。对于固定应用,建议在清洁条件下 多次采样(x2),而在脏污条件下进行多次采样(x8)。在此范围内播放以查找反应最佳的数量。
扫描循环时间 [5] 会影响区域扫描仪的响应时间。40 ms 的正常扫描循环时间用于完整的保护区域范围,而 30 ms 的快速扫描循环时间用于较小的保护区域范围,甚至更短的响应时间。通常,选择正常扫描时间。
如果存在其他区域扫描仪,则考虑其他干扰保护 [6]。在机床上 仅使用一个区域扫描仪时,应选择模式 1。
Click on Fields to set the protective field that triggers the safety area scanner. Using the drawing tools [1], you can draw the desired field set. Multiple fields can be configured in the same field set [2] to achieve the proper size.
NOTE: For more accuracy, assign coordinates to the fields [3].
A masked area [4] can be drawn into the field. This represents an area that does not trigger the safety area scanner.
IMPORTANT: Make sure that the field set is a protective [5] rather than a warning field. A protective field set will cause all robot motion to stop when triggered whereas a warning field set will only cause a yellow warning screen to appear on the area scanner.
Each field can be individually configured by changing the multiple sampling and object resolution [6].
Click on Monitoring Cases to apply the protective field set.
Drag Monitoring Plane 1 [1] into Monitoring Case 1's cut off path 1 [2].
Check the OSSD box [3] below cut off path 1. This turns the output safety switching device ON when the protective field is triggered. With the output safety switching device ON, the robot motion will stop.
Click on Transfer to move the configuration from the computer software to the safety area scanner.
Click Transfer to Device [1].
A pop up appears asking if the device can enter Test Mode. Click Yes.
Enter the Authorized client's password as needed.
Read through the configuration report and Verify.
Tape [1] the safety area scanner protective field [2] onto the floor.
Test the configured safety area scanner.
Make sure that the safety area scanner LED screen [3] turns green when outside the protective field and red when inside the protective field.
NOTE: If the actual protective field doesn't match the desired protective field--edit the protective field, insert the protective field into Monitoring Case 1's cut off path and transfer the configuration over again. Play around until the desired protective field is reached.
IMPORTANT: Make sure that there are no blind spots in the protective field.
Remove the micro USB from the area scanner to computer.
Recently Viewed Items
You Have No Recently Viewed Items Yet

此价格包含运费、出口和进口关税、保险费以及任何在运送至与您(买家)商定的位于法国的某一地点的过程中产生的其他费用。在 Haas 数控产品的交付中不会添加任何其他强制性费用。
随时掌握 HAAS 最新提示和技术……
HAAS TOOLING 接受以下条件:


This site is protected by reCAPTCHA and the Google Privacy Policy and Terms of Service apply.

2800 Sturgis Rd., Oxnard, CA 93030 / Toll Free: 800-331-6746
Phone: 805-278-1800 / Fax: 805-278-2255


