MyHaas Welcome,
!
Haas Tooling Guest Order History MyHaas/HaasConnect Sign In Register Haas Tooling My Account Order History Return History MyHaas/HaasConnect Sign Out Welcome, My Machines Latest Activity My Quotes My Account My Users Sign Out
Find Your Distributor
  1. Select Language
    1. English
  • machines Main Menu
    • Haas Vertical Mills Vertical Mills
      Vertical Mills
      Vertical Mills View All
      • Vertical Mills
      • VF Series
      • Universal Machines
      • VR Series
      • VP-5 Prismatic
      • Pallet-Changing VMCs
      • Mini Mills
      • Mold Machines
      • High-Speed Drill Centers
      • Drill/Tap/ Mill Series
      • Toolroom Mills
      • Compact Mills
      • Gantry Series
      • SR Sheet Routers
      • Extra-Large VMC
      • Double-Column Mills
      • Control Simulator
      • Mill Automatic Parts Loader
      • VMC/UMC Side-Loading Automatic Parts Loader
      • Compact Automatic Parts Loader
    • Product Image Multi-Axis Solutions
      Multi-Axis Solutions
      Multi-Axis Solutions View All
      • Multi-Axis Solutions
      • Y-Axis Lathes
      • 5-Axis Mills
    • Haas Lathes Lathes
      Lathes
      Lathes View All
      • Lathes
      • ST Series
      • Dual-Spindle
      • Box Way Series
      • Toolroom Lathes
      • Chucker Lathe
      • Haas Bar Feeder V2
      • Lathe Automatic Parts Loader
    • Haas Horizontal Mills Horizontal Mills
      Horizontal Mills
      Horizontal Mills View All
      • Horizontal Mills
      • 50-Taper
      • 40-Taper
    • Haas Rotaries & Indexers Rotaries & Indexers
      Rotaries & Indexers
      Rotaries & Indexers View All
      • Rotaries & Indexers
      • Rotary Tables
      • Indexers
      • 5-Axis Rotaries
      • Extra-Large Rotaries
    • Special Series
      Special Series
      Special Series View All
      • Special Series
      • EU_Series_Redirect
    • Product Image Automation Systems
      Automation Systems
      Automation Systems View All
      • Automation Systems
      • Mill Automation
      • Lathe Automation
      • Automation Models
    • Haas Drill Centers Desktop Machines
      Desktop Machines
      Desktop Machines View All
      • Desktop Machines
      • Desktop Mill
      • Desktop Lathe
    • Haas Shop Equipment Shop Equipment
      Shop Equipment
      Shop Equipment View All
      • Shop Equipment
      • Bandsaw
      • Knee Mill
      • Surface Grinder, 2550
      • Surface Grinder, 3063
      • Laser Cutting Machine
    • QUICK LINKS Special Series  Special Series 
      EU SERIES EU SERIES BUILD & PRICE | PRICE LIST BUILD & PRICE | PRICE LIST In-Stock Machines In-Stock Machines WHAT’S NEW WHAT’S NEW YOUR FIRST CNC YOUR FIRST CNC
      SHOPPING TOOLS
      • Build & Price a Haas
      • Price List
      • Available Inventory
      • CNCA Financing
      WANT TO TALK TO SOMEONE?

      A Haas Factory Outlet (HFO) can answer your questions, and walk you through your best options.

      CONTACT YOUR DISTRIBUTOR >
  • Options Main Menu
    • Product Image Spindles
      Spindles
      Spindles View All
      • Spindles
    • Product Image Tool Changers
      Tool Changers
      Tool Changers View All
      • Tool Changers
    • Product Image 4th- | 5th-Axis
      4th- | 5th-Axis
      4th- | 5th-Axis View All
      • 4th- | 5th-Axis
    • Product Image Turrets & Live Tooling
      Turrets & Live Tooling
      Turrets & Live Tooling View All
      • Turrets & Live Tooling
    • Product Image Probing
      Probing
      Probing View All
      • Probing
    • Haas Chip & Coolant Management Chip & Coolant Management
      Chip & Coolant Management
      Chip & Coolant Management View All
      • Chip & Coolant Management
    • The Haas Control The Haas Control
      The Haas Control
      The Haas Control View All
      • The Haas Control
    • Product Image Product Options
      Product Options
      Product Options View All
      • Product Options
    • Product Image Tooling & Fixturing
      Tooling & Fixturing
      Tooling & Fixturing View All
      • Tooling & Fixturing
    • Product Image Workholding
      Workholding
      Workholding View All
      • Workholding
    • Product Image 5-Axis Solutions
      5-Axis Solutions
      5-Axis Solutions View All
      • 5-Axis Solutions
      • 5 Easy Steps to 5-Axis
    • QUICK LINKS Special Series  Special Series 
      EU SERIES EU SERIES BUILD & PRICE | PRICE LIST BUILD & PRICE | PRICE LIST In-Stock Machines In-Stock Machines WHAT’S NEW WHAT’S NEW YOUR FIRST CNC YOUR FIRST CNC
      SHOPPING TOOLS
      • Build & Price a Haas
      • Price List
      • Available Inventory
      • CNCA Financing
      WANT TO TALK TO SOMEONE?

      A Haas Factory Outlet (HFO) can answer your questions, and walk you through your best options.

      CONTACT YOUR DISTRIBUTOR >
  • Why Haas Main Menu
      Discover the Haas Difference
    • Why Haas
    • MyHaas
    • Education Community
    • Industry 4.0
    • Haas Certification
    • Customer Testimonials
  • Service Main Menu
      Welcome to Haas Service
      SERVICE HOME Operator’s Manuals How-To Procedures Troubleshooting Guides Preventive Maintenance Haas Parts Haas Tooling Videos
  • Videos Main Menu
  • Main Menu
    • View All
    • View All
    • View All
    • View All
      • HTEC Curriculum Support
    • View All
      • Haas 10 kg Cobot Package
      • Cobot Kits
    • View All
    • View All
      • 4 - AUTOMATION SYSTEMS
      • Mill Toolholding
      • Carousel-V2
    • View All
    • View All
    • View All
    • View All
    • QUICK LINKS Special Series  Special Series 
      EU SERIES EU SERIES BUILD & PRICE | PRICE LIST BUILD & PRICE | PRICE LIST In-Stock Machines In-Stock Machines WHAT’S NEW WHAT’S NEW YOUR FIRST CNC YOUR FIRST CNC
      SHOPPING TOOLS
      • Build & Price a Haas
      • Price List
      • Available Inventory
      • CNCA Financing
      WANT TO TALK TO SOMEONE?

      A Haas Factory Outlet (HFO) can answer your questions, and walk you through your best options.

      CONTACT YOUR DISTRIBUTOR >
  • Haas Tooling Main Menu
      Automation Accessories Shop Support Mill Toolholding Mill Cutting Tools Boring Systems Mill Workholding Lathe Toolholding Lathe Cutting Tools Lathe Workholding Package Kits ER Collets & Chucks Holemaking Threading Broaching Tombstones & Kits Manual Chucks For Milling Deburring & Abrasives Tool Presetter & Heat Shrinkers Storage & Handling Machine Maintenance Tooling Accessories Apparel & Accessories Measuring & Inspection Winner's Circle Winner's Circle Clearance Today's Hot Deals
    • Haas Tooling
    • Winner's Circle
      Winner's Circle Shop All
      • WINNERS_CIRCLE-1Y
    • Winner's Circle
      Winner's Circle Shop All
      • WC-1Y-EU
    • Today’s Hot Deals
      Today’s Hot Deals Shop All
      • Mill Toolholding
      • Mill Tooling
      • Measuring & Inspection
      • Boring Systems
      • Mill Workholding
      • Shell Mill Kits
      • Lathe Toolholding
      • Lathe Tooling
      • Lathe Workholding
      • ER Collets & Chucks
      • Holemaking
      • Threading
      • Broaching
      • Tool Storage
      • Apparel & Accessories
    • Clearance
      Clearance Shop All
    • Measuring & Inspection
      Measuring & Inspection Shop All
      • Probe Kits & Accessories
      • Edge & Center Finders
      • Comparative Measuring Gauges
      • Height Gauges
      • Calipers
      • Threaded Plug & Ring Gauges
      • Gauge Blocks
      • Pin Gauges
      • Drop Indicators
      • Dial Test Indicators
      • Bore Gauges
      • Indicator Accessories
      • V Blocks
      • Setup Blocks
      • Depth Measuring
      • Micrometers
      • Micrometer Accessories
      • Micrometer Kits
      • Bore Gauge Kits
      • Starter Kits
      • Indicator Kits
      • Caliper Kits
      • Toolholder Check Station
      • Height Setters
      • Coordinate Measuring Machines
    • Automation Accessories
      Automation Accessories Shop All
      • Cobot Kits
      • Cobot Kits
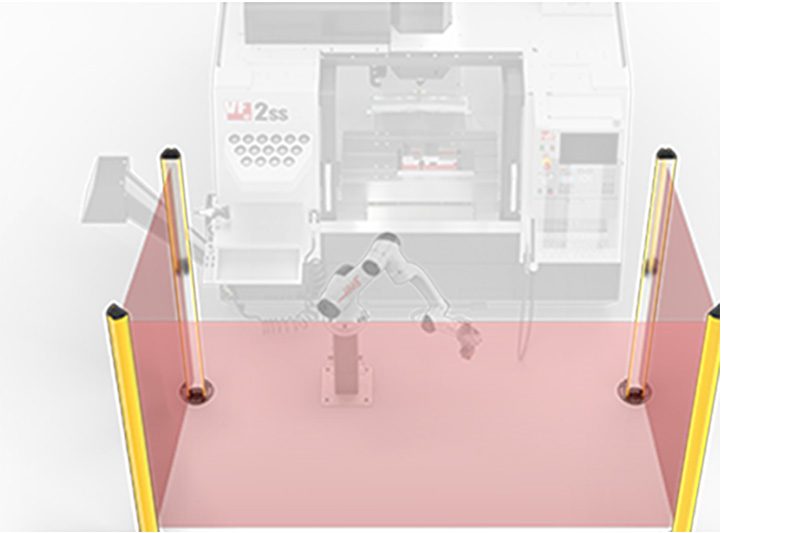
      • Protective Barriers
      • Grippers
      • Robot Cell Accessories
    • Shop Support
      Shop Support Shop All
      • Air Compressors
      • Laser Marking Machines
      • Bandsaw Blades
      • Bandsaw Accessories
      • Surface Grinding Wheels
      • Shop Equipment Accessories
    • Mill Toolholding
      Mill Toolholding Shop All
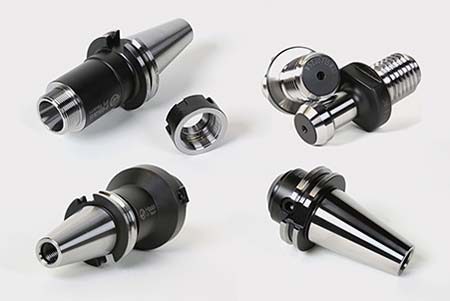
      • End Mill Holders
      • Shell Mill Holders
      • Shrink Fit Holders
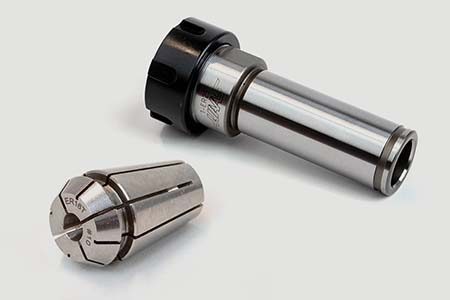
      • ER Collet Chucks
      • Milling Chucks & Collets
      • NC Drilling Chucks
      • Pull Studs / Retention Knobs
      • Rotary Tool Holder & Tool Chuck Kits
      • Hydraulic Milling Chucks & Collets
      • Toolholder Attachments & Wrenches
      • Mill Broaching Holders
    • Mill Tooling
      Mill Tooling Shop All
      • Shell Mill Bodies
      • Milling Inserts
      • End Mills
      • Chamfer Mills & Inserts
      • Indexable End Mill Bodies
      • Ball End Mills
      • Chamfer End Mills
      • Roughing End Mills
      • Indexable Ball End Mills & Inserts
      • Shell Mill Kits
      • Chamfer Mill Kits
      • Indexable End Mill Kits
      • Dovetail Cutters
      • Indexable Dovetail Cutters
      • Engraving End Mills
      • Rotary Burrs / Die Grinding Bits
      • Keyseat Cutters
      • Corner Rounding End Mills
      • Slot Mill Bodies
      • CNC Router Bits For Wood
    • Boring Systems
      Boring Systems Shop All
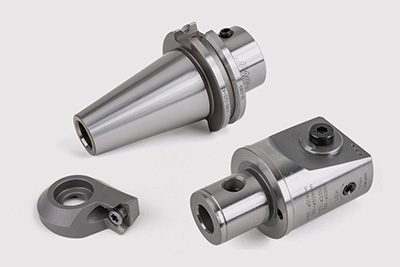
      • Boring Heads & Cartridges
      • Boring Holders & Extensions
    • Mill Workholding
      Mill Workholding Shop All
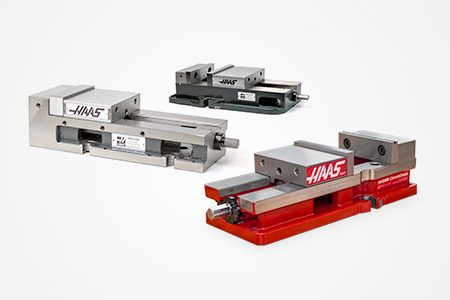
      • Fixed-Jaw Vises
      • Self-Centering Vises
      • Adapter Plates
      • Vise Jaws
      • Vise Mounts & Fixtures
      • Vise Kits
      • Vise Parallels
      • Rotary Vise Kits
      • Fixture Clamps & Rails
      • Automated Workholding Kits
      • Tooling Fixture Subplates
      • Toolmakers' Vises
      • Clamp Force Gauges
      • Collet Fixtures
      • Angle Plates
    • Lathe Toolholding
      Lathe Toolholding Shop All
      • TL & CL Static Turning Holders
      • BOT Static Turning Holders
      • BMT Static Turning Holders
      • Live / Driven Turning Holders
      • Turning Holder Reduction Sleeves / Bushings
      • VDI Static Turning Holders
      • Turning Holder Accessories
    • Lathe Tooling
      Lathe Tooling Shop All
      • Cut-Off Tool Blocks & Blades
      • Cut-Off Tooling Kits
      • Turning Inserts
      • Grooving & Cut-Off Tools
      • Internal (ID) Grooving & Threading Tools
      • Threading Inserts
      • Threading Tools
      • Boring Bars / Internal (ID) Turning Tools
      • External (OD) Turning Tools
      • Cermet Turning Inserts
      • CBN Turning Inserts
      • Haas Notch Grooving & Threading Inserts
      • Haas Notch Grooving & Threading Tools
      • Micro Turning Tools
      • Desktop Lathe Tools
    • Lathe Workholding
      Lathe Workholding Shop All
      • Live Centers
      • Spindle Reduction Sleeves / Liners
      • Quick-Change Collets
      • Quick-Change Collet Chucks
      • 5C Collets
      • 5C Collet Sets
      • Lathe Jaw Boring Rings
      • Lathe Jaws
      • Bar Pullers
      • Scroll Chucks
      • Guide Pins
      • Collet Accessories
    • Package Kits
      Package Kits Shop All
      • Chip Clearing Fan Kits
      • Cutting Tool Kits
      • Indexable End Mill Kits
      • Cut-Off Tool Block & Blade Kits
      • Drill & Tap Kits
      • Indexable Drilling Kits
      • Shell Mill Kits
      • Chamfer Mill Kits
      • Rotary Tool Holder & Tool Chuck Kits
      • Lathe Starter Kits
      • Workholding Kits
      • Rotary Vise Kits
      • Vise Kits
      • 3-Jaw Chuck Kits for Mills
      • Tombstone Kits
      • Reduction Sleeve Kits
      • Automated Workholding Kits
      • Measuring & Inspection Kits
      • Starter Kits
      • Bore Gauge Kits
      • Caliper Kits
      • Indicator Kits
      • Micrometer Kits
    • ER Collets & Chucks
      ER Collets & Chucks Shop All
      • ER Straight-Bore Collets
      • ER Sealed Collets
      • ER Tap Collets
      • ER Collet Sets & Accessories
      • ER Collet Chucks
      • Straight Shank ER Collet Chucks
      • Straight Shank Keyless NC Drilling Chucks
    • Holemaking
      Holemaking Shop All
      • Carbide Drills
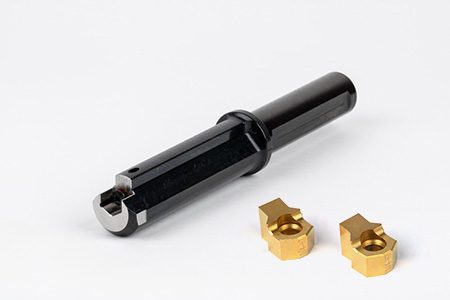
      • Indexable Drill Bodies
      • Indexable Drill Inserts
      • Modular Drill Bodies
      • Modular Drill Heads
      • Cobalt Drills & Sets
      • Center Drills
      • Reamers
      • Indexable Drilling Kits
      • Spot Drills
      • Spade Drill Bodies
      • Spade Drill Inserts
      • Countersinks
    • Threading
      Threading Shop All
      • Taps
      • Threading Inserts
      • Threading Tools
      • Thread Mills
      • Pipe Taps
      • Drill Tap Kits
    • Broaching
      Broaching Shop All
      • Broaching Tools
      • Broaching Inserts
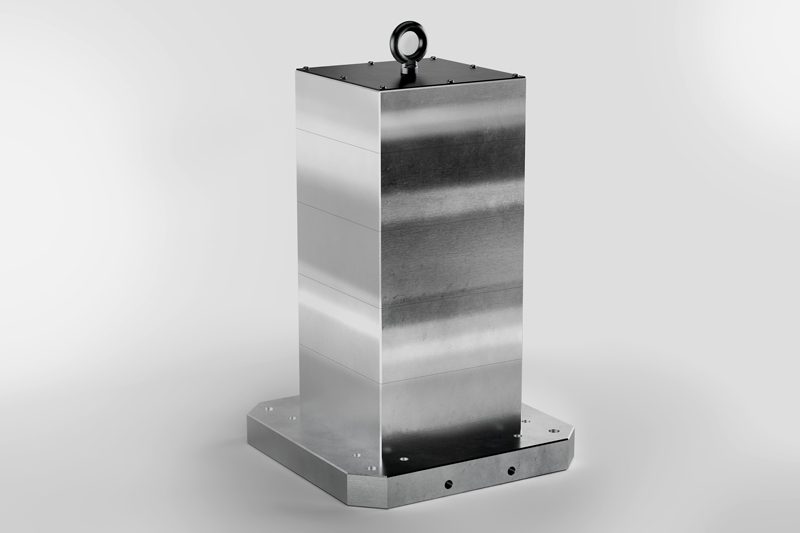
    • Tombstones
      Tombstones Shop All
      • Tombstones
      • Tombstone Kits
      • Vise Cluster Towers
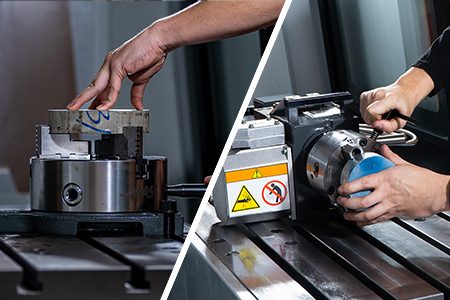
    • Manual Chucks For Milling
      Manual Chucks For Milling Shop All
      • 3-Jaw Chucks & Mounts for Mills
    • Deburring & Abrasives
      Deburring & Abrasives Shop All
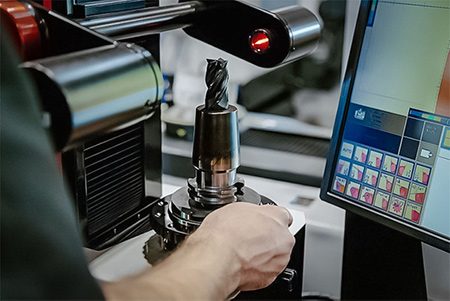
      • Abrasive Pads
      • Deburr Tools
      • Deburr Wheels
      • Abrasive Sheets & Rolls
      • Sharpening / Lapping Stones
    • Tool Presetter & Heat Shrinkers
      Tool Presetter & Heat Shrinkers Shop All
      • Tool Presetting Machines
      • Shrink Fit Machines
    • Tool Storage
      Tool Storage Shop All
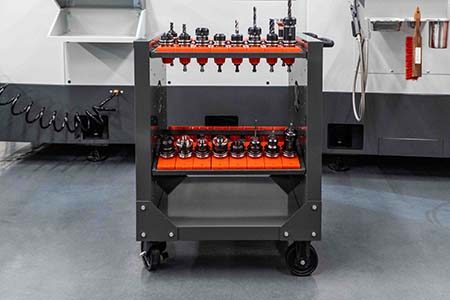
      • Tool Carts
      • Tool Tray
      • Tool Bags
    • Machine Maintenance
      Machine Maintenance Shop All
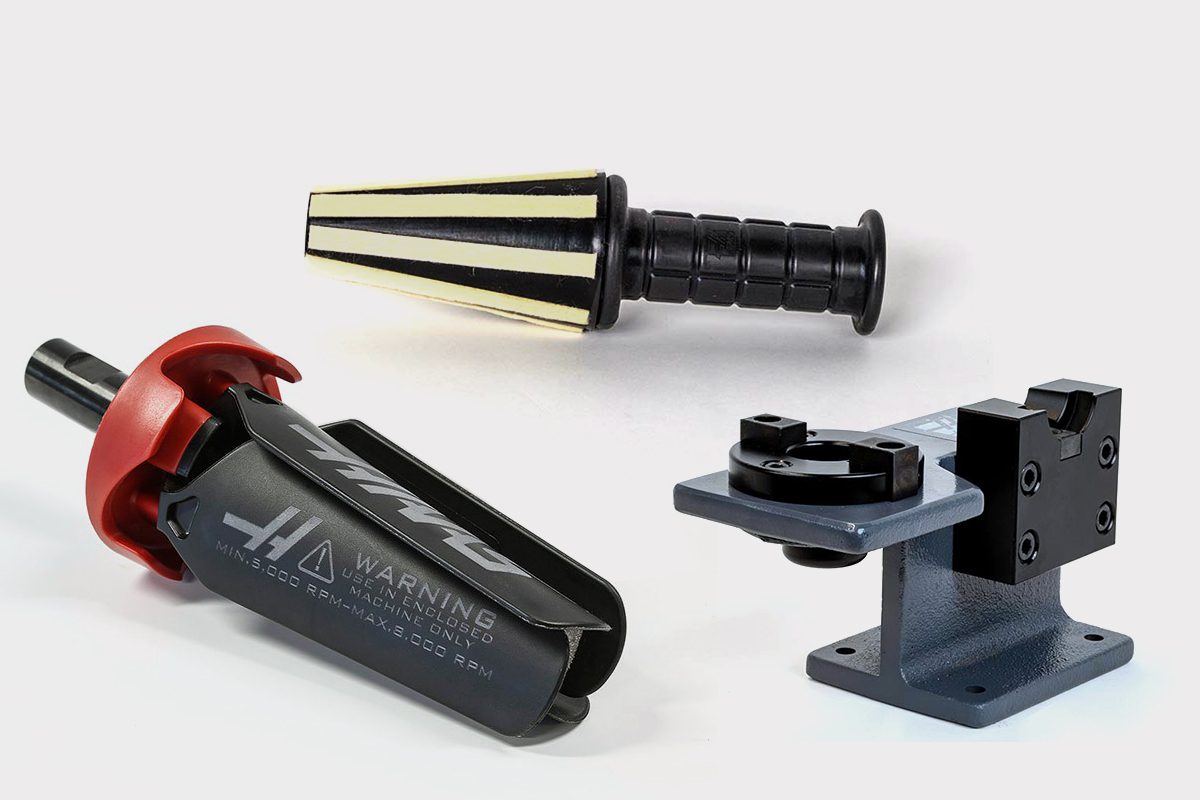
      • Spindle Test Bars
      • Levels
      • Refractometers
      • Machine Additives & Supplies
      • Machine Accessories
      • Machine Maintenance Kits
    • Tooling Accessories
      Tooling Accessories Shop All

      • Spindle & Toolholder Taper Cleaners
      • Haas Shop Lift
      • Toolholder Fixtures
      • CNC Chip Clearing Fans
      • Hammers & Mallets
      • Anti-Fatigue Mats
      • Layout Tools
      • Wrenches
      • Magnetic Tools
      • Torque Screwdrivers
      • Hand Cutting Tools
      • Shop Stools
      • Lifting Magnets
      • Safety Apparel
      • Cutting Tool Sharpeners
    • Apparel & Accessories
      Apparel & Accessories Shop All
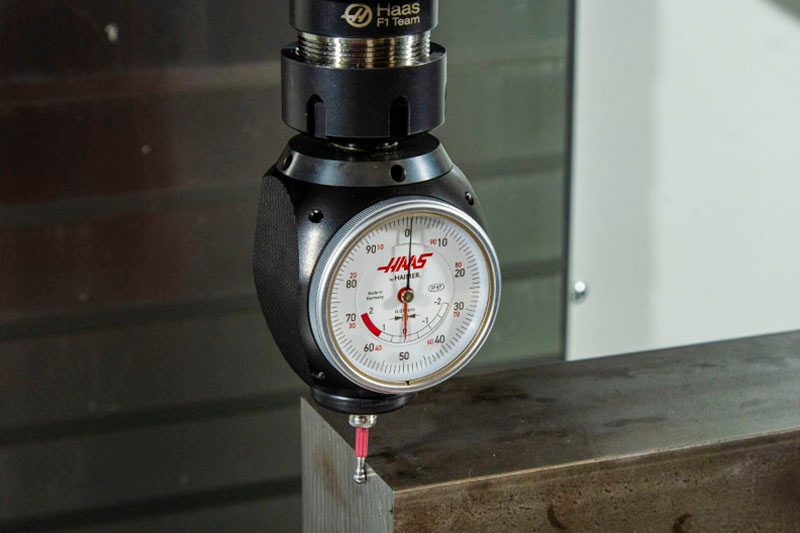
      • Accessories
      • Apparel
    • HAAS TOOLING QUICK LINKS
      NEW PRODUCTS NEW PRODUCTS NEW PRODUCTS NEW PRODUCTS
      MOST POPULAR MOST POPULAR
      TOOLING PROMOS TOOLING PROMOS
      FINANCING & OPEN TERMS FINANCING & OPEN TERMS PAY BY INVOICE PAY BY INVOICE
      FAQs FAQs
      KITS CREATED FOR YOU KITS CREATED FOR YOU
  • Haas Service Parts Main Menu
      Automatic Pallet Changer Lathe Turret Tool Changer Chip Management Coolant Counterbalance Electrical Cabinet Enclosure Hydraulics Lubrication Maintenance Pendant Probing Rotary Spindle Tailstock
    • Haas Service Parts
    • Automatic Pallet Changer
      Automatic Pallet Changer Shop All
      • HMC - Automatic Pallet Changer
      • VMC - Automatic Pallet Changer
    • Lathe Turret
      Lathe Turret Shop All
      • Lathe - Turret
      • Live Tooling
    • Tool Changer
      Tool Changer Shop All
      • Side Mount
      • Umbrella
    • Chip Management
      Chip Management Shop All
      • Multi Auger
      • Single Auger
    • Coolant
      Coolant Shop All
      • Auxiliary Filter
      • HPC-300 (Lathe)
      • HPC-1000 (Lathe)
      • Oil Skimmer
      • Standard Coolant
      • TSC-300 (Mill)
      • TSC-1000 (Mill)
      • Coolant Refill
      • Loc-Line
    • Counterbalance
      Counterbalance Shop All
      • Charge & Discharge Hose
    • Electrical Cabinet
      Electrical Cabinet Shop All
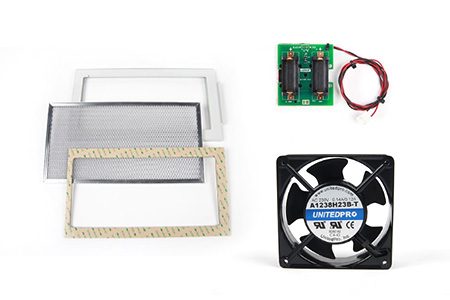
      • Fans
      • Filters
      • Upgrade Kits
    • Enclosure
      Enclosure Shop All
      • Accessories
      • Air Nozzle
      • Decals
      • Door Bumpers
      • Lighting
      • Windows, Gaskets, & Weather Strip
      • Chip & Coolant Management
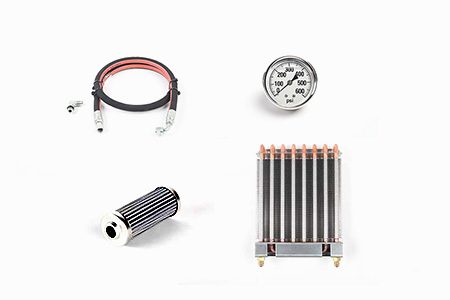
    • Hydraulics
      Hydraulics Shop All
      • Filters
      • Gauges
      • Heat Exchanger
      • Hoses
    • Lubrication
      Lubrication Shop All
      • Bijur Mechanical Lubrication
      • Minimum Lubrication
    • Maintenance
      Maintenance Shop All
      • Grease, Oil, & Sealants
    • Pendant
      Pendant Shop All
      • Floppy Disk & USB
      • Keypad
      • Keys
      • Lens
      • Gaskets & Seals
    • Probing
      Probing Shop All
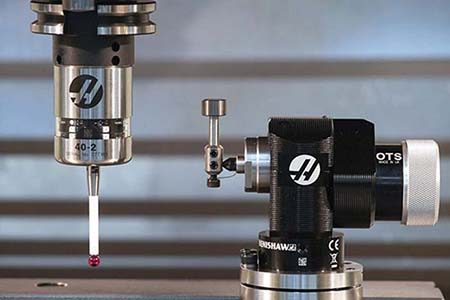
      • Mill Probing
      • Lathe Tool Presetter
    • Rotary
      Rotary Shop All
      • Rotary Gaskets & Seals
    • Spindles
      Spindles Shop All
      • Couplings
      • Gaskets & Seals
      • Spindle Motor Drive
      • Gearbox Drive
      • Tool Release Piston
    • Tailstock
      Tailstock Shop All
      • Handles
×

Search Results

Web Pages

Images

    • <
    • 1
    • >
MyHaas Welcome,
!
Haas Tooling Guest Order History MyHaas/HaasConnect Sign In Register Haas Tooling My Account Order History Return History MyHaas/HaasConnect Sign Out Welcome, My Machines Latest Activity My Quotes My Account My Users Sign Out
Find Your Distributor
  1. Select Language
    1. English
×

Search Results

Web Pages

Images

    • <
    • 1
    • >

7 - MM / SMM - Spindle

MiniMill / Super Minimill - Interactive - Service Manual


  • 0 - MM / SMM - Table of Contents
  • 1 - MM / SMM - Introduction
  • 2 - MM / SMM - Specifications
  • 3 - MM / SMM - Installation
  • 4 - MM / SMM - Umbrella Tool Changer
  • 5 - MM / SMM - SMTC
  • 6 - MM / SMM - Axis Motion
  • 7 - MM / SMM - Spindle
  • 8 - MM / SMM - Spindle Motor
  • 9 - MM / SMM - Lubrication Systems
  • 10 - MM / SMM - Electrical Control
  • 11 - MM / SMM - Chip Removal and Coolant
  • 12 - MM / SMM - Workholding
  • 13 - MM / SMM - Maintenance
  • 14 - MM / SMM - Autodoor and Auto Window
  • 15 - MM / SMM - Robot and Automation
  • 16 - MM / SMM - Enclosure

Go To :

  • 7.1 40T - Belt/Gearbox Drive - Spindle - Replacement
  • 7.2 40T - Spindle - Troubleshooting
  • 7.3 40T - Spindle Drawbar - Troubleshooting
  • 7.4 Tool Release Piston - Troubleshooting

7.1 40T - Belt/Gearbox Drive - Spindle - Replacement

Recently Updated

40 Taper - Belt/Gearbox Drive - Spindle - Replacement


AD0114

Applies to machines built from: January, 1989

Removal

1

Remove the spindle-head cover panels.

Change Parameter 76, LOW AIR DELAY, to 999999999 to override the low air pressure warning.

Close the primary air valve. This stops the air supply to the machine.

Tools Required:

  • Oil Pan
  • 6" x 6" x 6" (152 mm x 152 mm x 152 mm) wooden or aluminum block

If the machine has through-spindle coolant (TSC), disconnect the TSC hose from the TSC check valve.

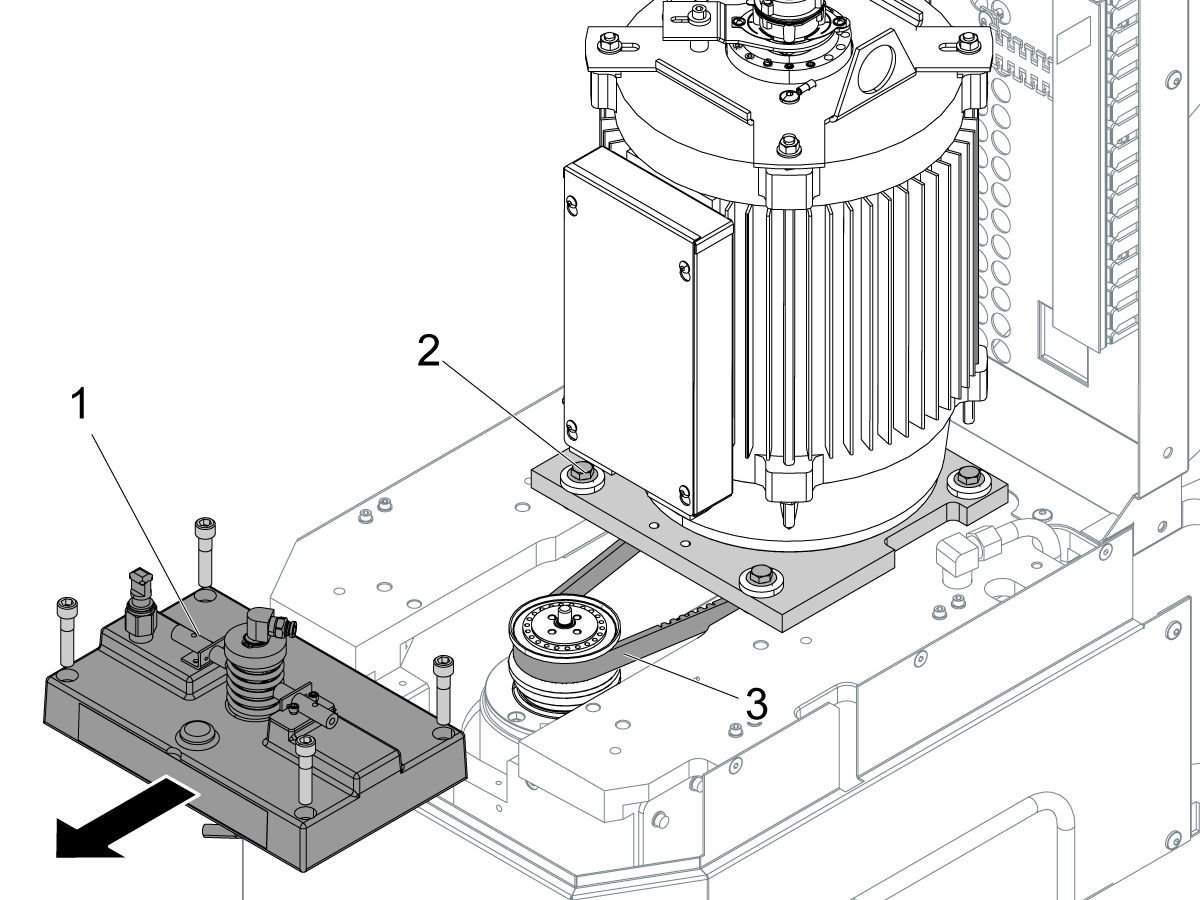
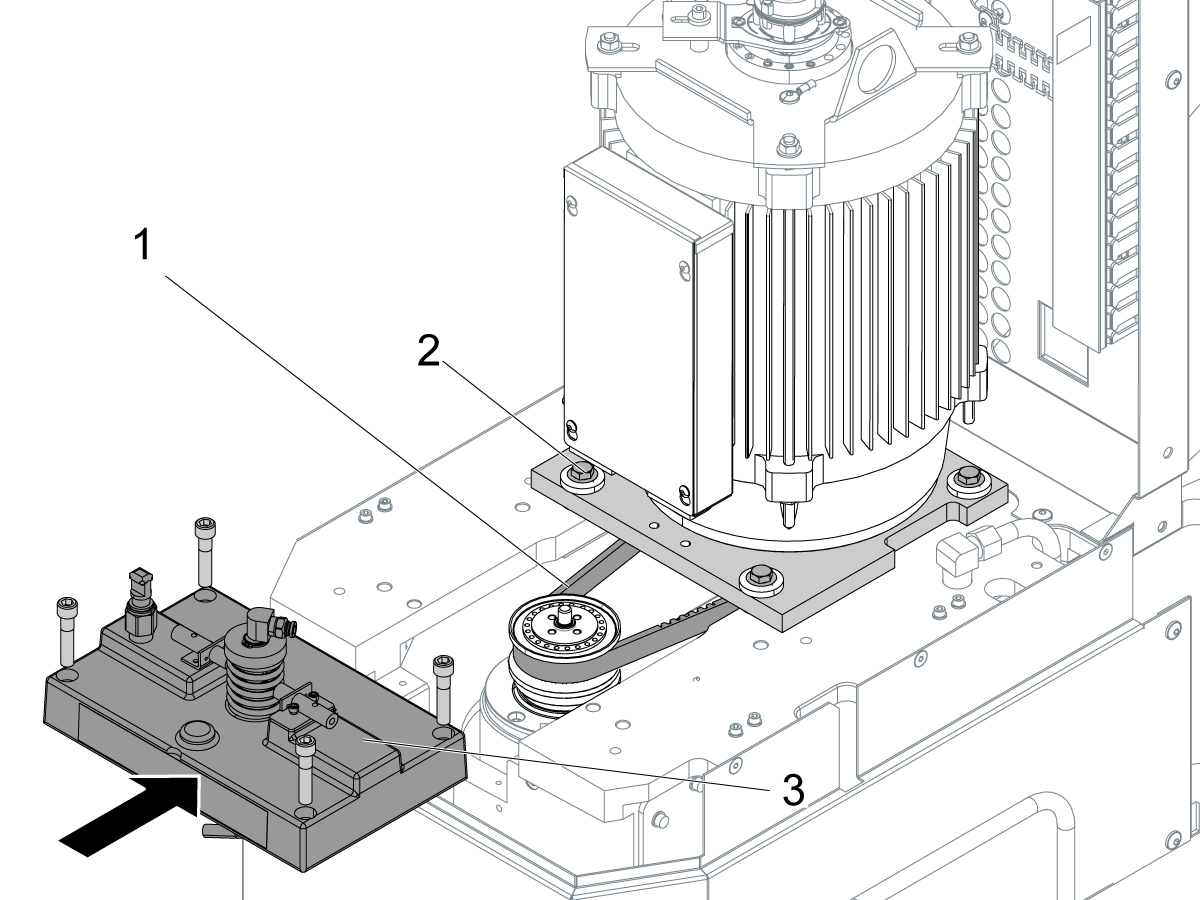
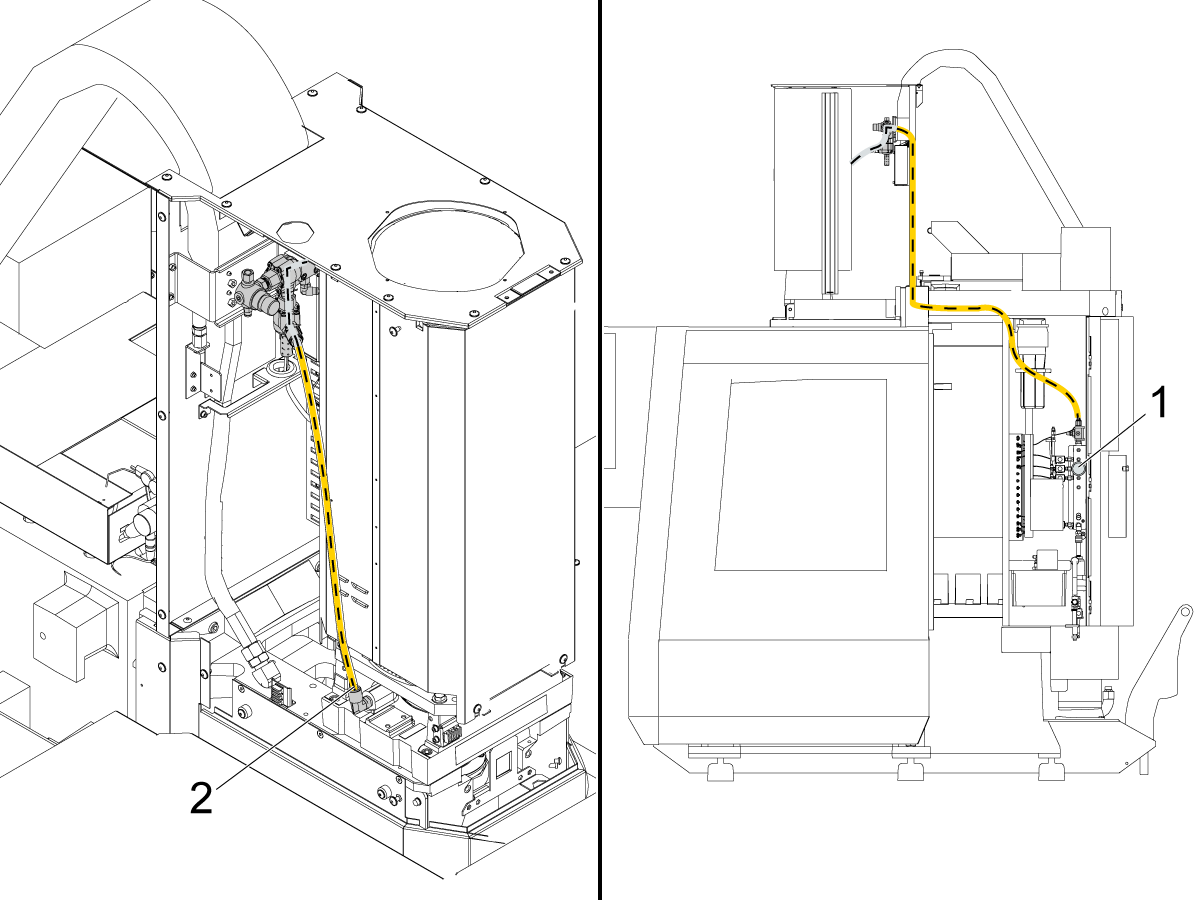
Remove the TRP assembly [1].

If the machine has a mid-belt shield, remove it.

Remove the screws [2] for the motor mount.

 Note: If necessary, remove the TSC check-valve assembly to get access to the motor mount screws.

Move the motor assembly forward a small distance to release the tension on the drive belts [3].

Remove the drive belts.


2

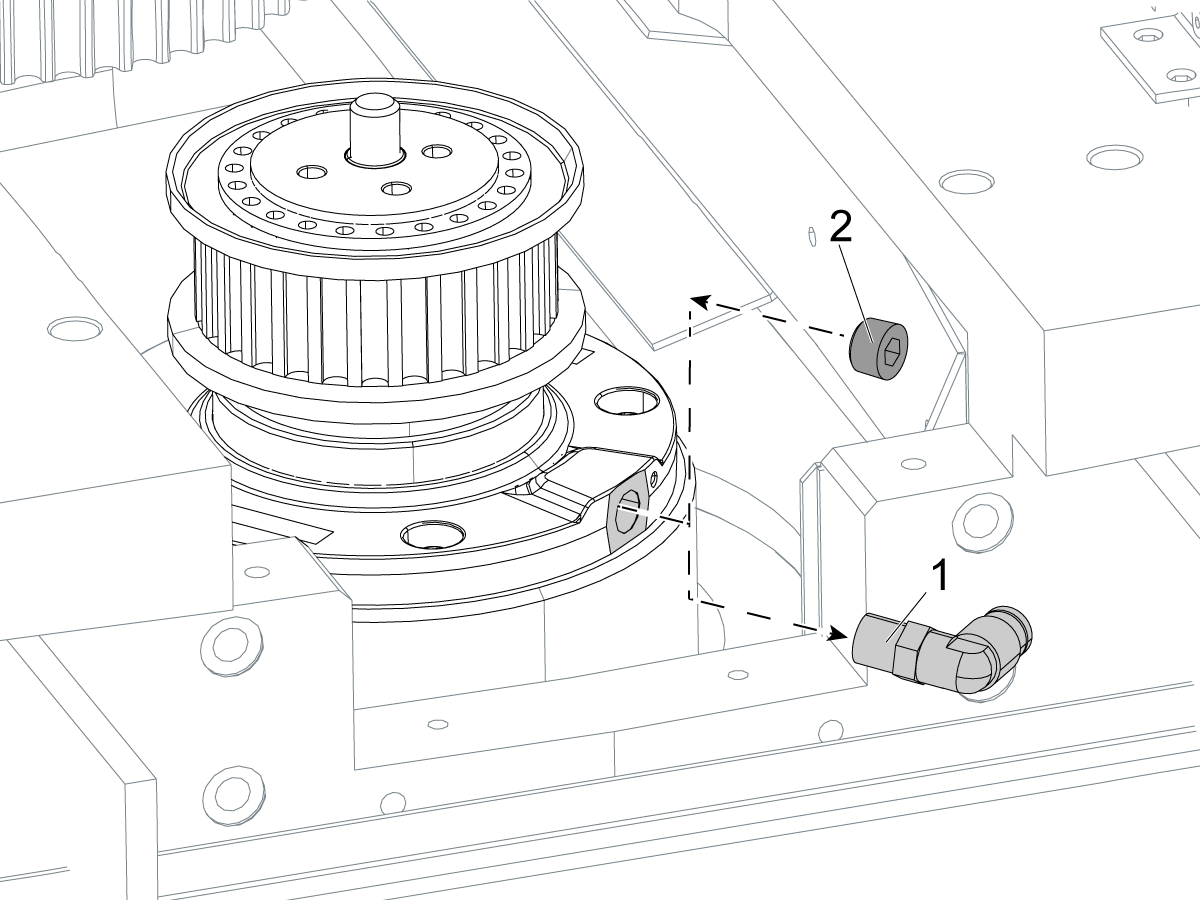
Disconnect the oil line.

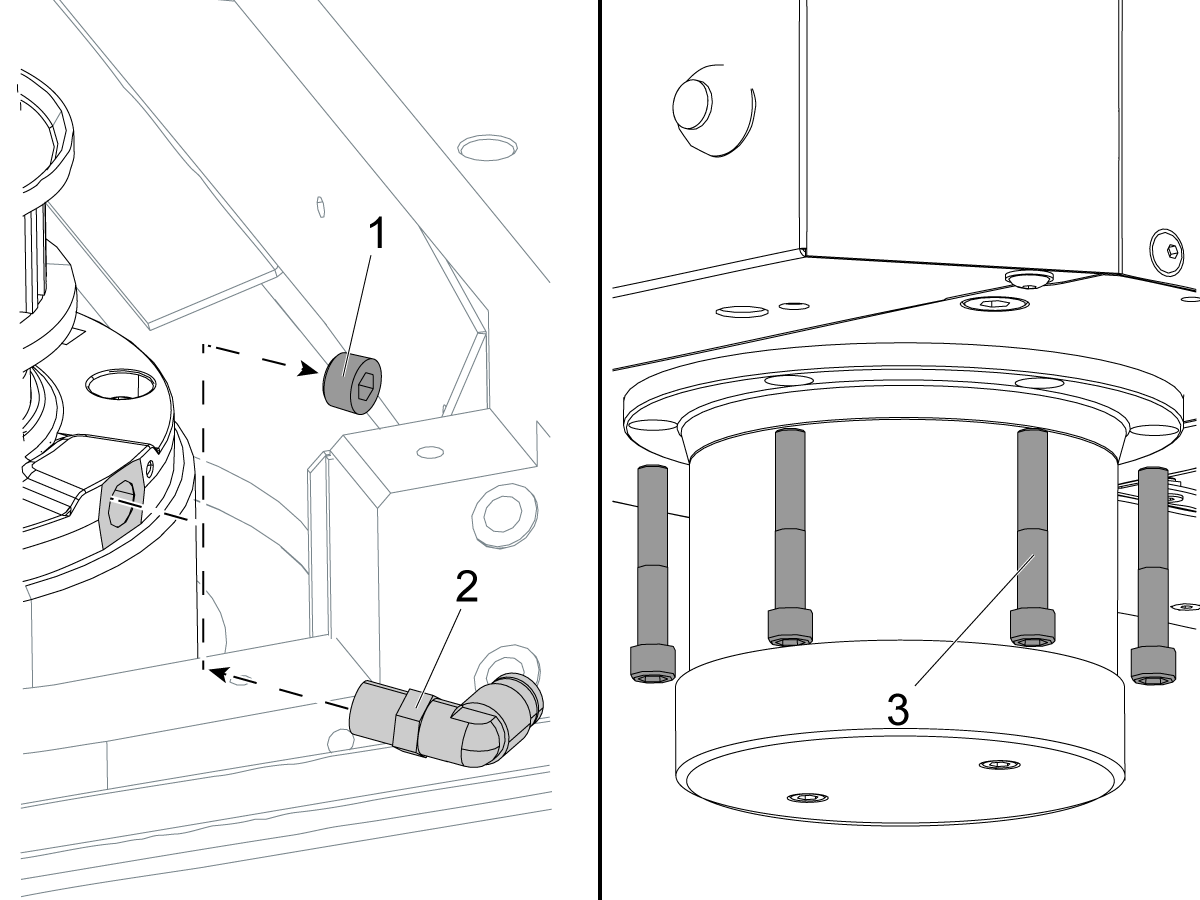
Remove the 90-degree fitting from the spindle lubrication port [1].

Install a 1/8" NPT plug [2] into the oil fitting port on the spindle. Install the plug flush or below flush with the surface of the spindle.

 Note: Grease Pack machines equipped with positive air pressure:

The replacement grease pack spindle may have a cap in which the threads for the oil plug has been removed.  The cap on grease pack spindles no longer is cross drilled and tapped.

If you recieve a grease pack spindle with a cap like this, remove the positive air system from the machine.  Refer to: Grease Pack Spindle  - Positive Air Pressure - Removal.

3

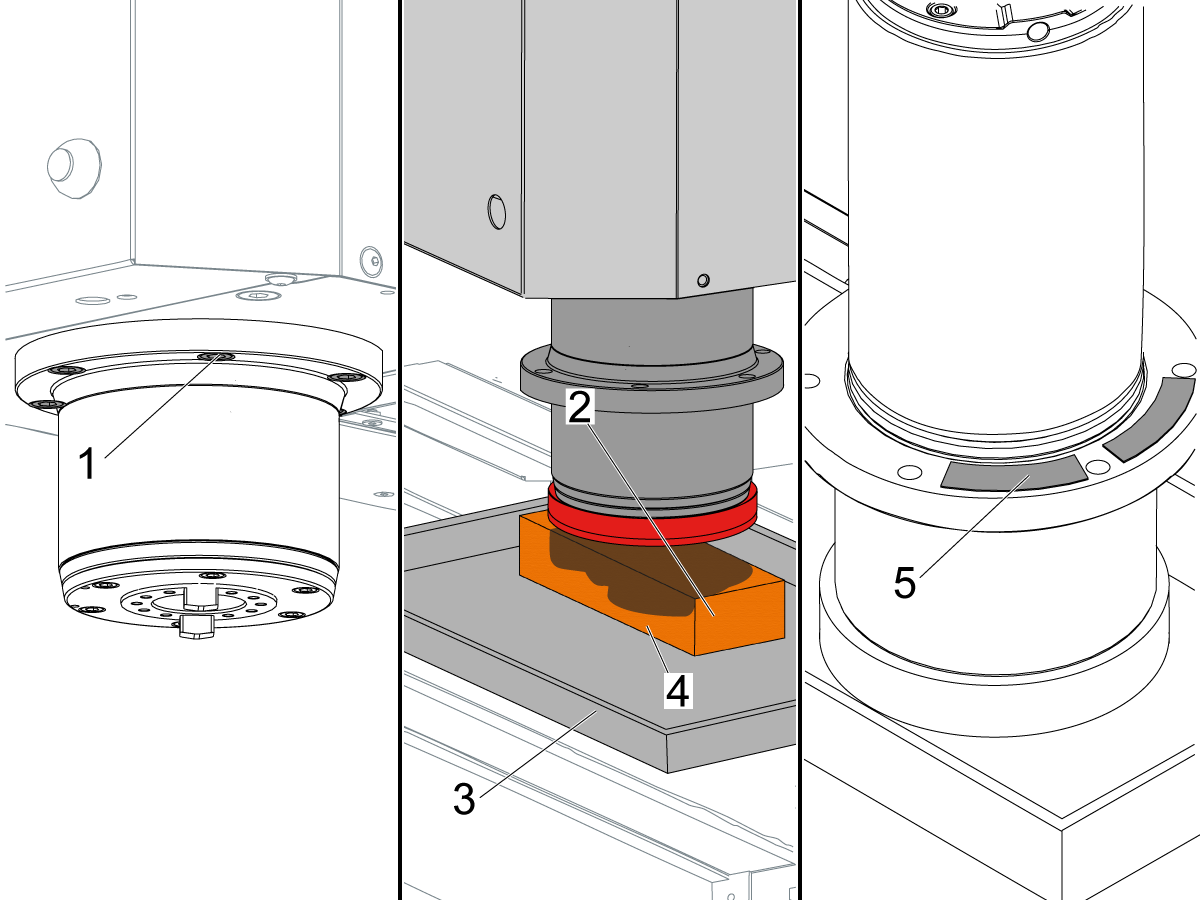
Put an oil pan [3] and a block of wood [4] on the table to catch oil leaks.

Loosen the (6) spindle screws [1] (2) turns.

Install the protective cap [2] over the spindle nose. The protective cap prevents damage to the spindle when it touches the table.

Jog the Z Axis in the negative (-) direction until the spindle touches the pan.

Remove the (6) spindle screws.

Jog the Z Axis in the positive (+) direction until the spindle head clears the spindle.

Remove the shims [5].

Installation

1

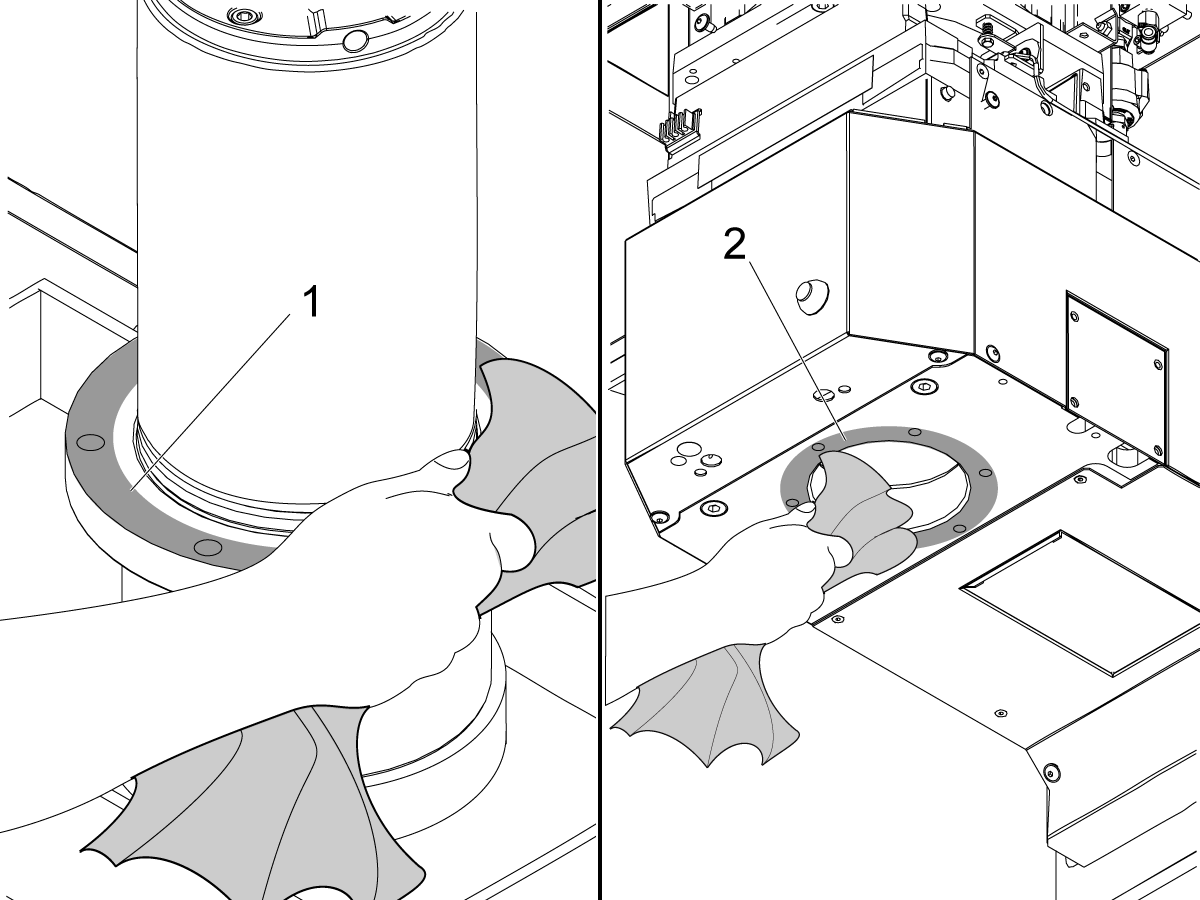
Clean and stone the surfaces where the spindle flange [1] and the spindle casting [2] touch.

2

Turn the spindle until the oil fitting port points to the front of the machine.

Slowly jog the Z Axis in the negative (-) direction over the spindle.

When the spindle is fully into the spindle housing, do these steps:

  • Remove the 1/8" NPT plug [1] from the oil fitting port on the spindle.
  • Install the 90° spindle lubrication fitting [2] as shown.
  • Connect the spindle lubrication tube.
  • Turn the spindle to align it with the tapped holes in the casting.
  • Install the (6) spindle screws [3].
  • Torque the screws. Refer to Haas Fastener Torque Specifications.Use the value for iron.

3

Install the drive belts [1]. Do not tighten the belts.

Install the mid belt shield, if applicable.

Jog the Z Axis to the middle of travel.

Do the spindle sweep procedure. Refer to VMC - Spindle - Alignment ("Spindle Sweep").

Insert and hand-tighten the motor-mount screws [2].

Tension the belt. Refer to VMC - Drive Belt Tension - Gates Sonic Meter - Instructions.

Torque the motor-mount screws. Refer to Haas Fastener Torque Specifications. Use the value for iron.

Install the tool release piston (TRP) assembly [3]. Hand-tighten the screws.

If the machine has through-spindle coolant (TSC), connect the TSC hose to the top of the TRP.

 Note: Do not add oil to the spindle casting, even if it had oil before.

Change Parameter 76, LOW AIR DELAY, to its initial value.

Adjust the Tool Release Piston: VMC - 20/30/40-Taper- TRP - Proximity Sensor - Adjustment.

Set Parameter 64:

  • For a Side-Mount Tool Changer, refer to: VMC - Side-Mount Tool Changer - Set Parameter 64 - Z-Axis Tool Change Offset.
  • For an Umbrella Tool Changer, refer to: Umbrella Tool Changer - Set Parameter 64 - Z-Axis Tool Change Offset.

Set Parameter 257:

  • For a Side-Mount Tool Changer, refer to Side-Mount Tool Changer - Spindle Orientation Offset - Parameter 257.
  • For an Umbrella Tool Changer, refer to Umbrella Tool Changer - Spindle Orientation Offset - Parameter 257.

Run the spindle break-in program: Spindle - Break-in Programs - Lathe and Mill


7.2 40T - Spindle - Troubleshooting

Introduction

Download and fillout the Spindle Inspection Report Checklist below before replacing any parts.

Spindle Inspection Report Checklist

Symptom Table

Symptom Possible Cause Corrective Action
Spindle not turning and at Power On:  A Warning appears " The spindle may be rotating freely without power... " The software version is outdated. Check the software version to be 100.20.000.1200 or higher. Contact your Haas Factory Outlet to have the software updated.
Noise during rigid tapping. A NGC software error in version 100.17.000.xxx that caused a noticeable growling noise during rigid tapping, particularly with coarse pitch threads. Update software to the latest version.
Problems with the spindle encoder. Look for runout, loose mounting screws or shaft clamps, and any other obvious problems. Spindle Non-Contact Encoder (NCE) - Troubleshooting Guide - NGC
The Spindle is seized or it won't turn. The spindle has been crashed and now damage. Review alarm history for indications of a crash, check for visual damage to the spindle
There is heavy side loads causing the cap to gall the shaft. Check for clearance all the way around with a piece of 0.001” shimstock; loosen the cap, re-center and tighten.
The spindle lubrication system is not functioning correctly. Inspect the spindle lubrication system.
Spindle installed incorrectly Check Motor coupler for damage or indentations at the pin interfaces. Contact local HFO about issue including relevant pictures of the spindle to motor coupler.
The spindle  temperature exceed 140° F (60° C) The spindle lubrication system does not function correctly. Check for a clog in the spindle lube pump and verify the type of oil.
The spindle makes an unusual noise. The spindle drive belt is worn or damaged. Check the spindle drive belt for damaged.
The encoder pulleys or drive belt are worn or damaged. Check the encoder pulleys and belt.
The spindle lubrication system does not function correctly. Check for a clog in the spindle lube pump and verify the type of oil.

The surface finish shows chatter, or the spindle vibrates.

Alarm 966 EXCESSIVE PART/TOOL IMBALANCE.

The Main Processor PCB standoff hardware is loose or the Control Cabinet mounting hardware is loose or causing a bind.   Tighten the Main Processor PCB standoff hardware. Loosen the Control Cabinet mounting hardware, snug the hardware, then torque down the hardware.
The tool or tool holder may be too long for the application. Longer tools are less stable than shorter tools. Always use the shortest tool possible, and remember that a 10% reduction in the length-to-diameter ratio results in a 25% increase in tool stiffness. Unless absolutely necessary, the tool's stick-out from the holder should not be more than 3 times longer than its diameter.
The spindle drive belt is worn or damaged. Check the spindle drive belt.
The encoder pulleys or drive belt are worn or damaged. Check the encoder pulleys and belt.
The toolholder is fretting. Verify the length of the tool with the manufacturer's specifications.
The drawbar force is incorrect. Make sure the drawbar clamp force is correct. Refer to: VMC - Spindle - Drawbar - Force Measurement
The fixture does not support the part. Adjust the cutting load or program.
The tool is unbalanced. Balance the tool holder with the cutting tool in it. If you cannot balance the tool assembly, replace it with one that you can balance.
Excessive Endmill Runout - Mill. Tool runout should not exceed 0.0003" (0.076 mm). To check the tool runout, place a dial indicator on the tool, and then rotate the spindle by hand.
The spindle bearings are damaged. Perform a vibration analyzer.
The spindle is not balanced. Contact your HFO to balance the spindle.
Tools stick or do not come out of the spindle easily. The tool stayed in the spindle for hours while the machine was not in operation. Make sure a tool is not in the spindle when the machine is not in operation.
The volume of air supplied to the machine is not sufficient. Refer to: New Machine / Pre-Installation information for the correct air requirements.
The drawbar force is incorrect. Make sure the drawbar clamp force is correct.
The toolholder is fretting. Damage tool shank or spindle taper. Verify the length of the tool with the manufacturer's specifications. Maintain and inspect tool holders, and spindle taper.
There is no grease on the pull stud. Lubricate the pull stud.
(Through-spindle coolant only) Some coolants cause tools to stick. Coolants containing paraffin waxes can causing sticking tools when using high pressure Through Spindle Coolant with small orifice tooling. Test with a different type of coolant.
The spindle is getting too hot. Test the spindle lubrication system. Lack of, or excessive oil will create heat in the spindle.
Long gage length tooling. Stub up the tools to the extent possible. Reduce depth of cut. Use dynamic tool path and constant cutter engagement.
While running there is bearing Noise: squealing, screeching or skating. Noise from imbalance and vibration Make sure the tools are balanced.
Squealing noises from the TSC union. Check the TSC union.
Angular contact bearings that are mounted incorrectly can be noisy. Increasing the thickness of the shim under the front cap can eliminate these noises.
Too little preload can cause the balls to skid and the cages to chatter.
Too much clamping load can distort the races and cause the balls to skid, in turn creating cage chatter.
Bearings seated out of square.
Rubbing noises; Heat at the front cap. Spindle cartridge has been bumped there is a chance the front cap has been pushed to one side and is rubbing on the nose of the spindle shaft. Check for clearance all the way around with a piece of 0.001” shimstock; loosen the cap, re-center and tighten.
Noises during tool change. Some models have had the precharge circuit eliminated. This is a reliability improvement but a noise can be heard when the TRP contacts the drawbar or the release ring. This is normal.
The spindle oscillates during spindle orientation. The Wye contactor (if equipped) coil is not receiving power. Make sure the Wye/Delta contactors are operating correctly. Refer to: Wye-Delta Contactor - Troubleshooting Guide.
The spindle motor wiring is incorrect. The spindle motor wiring is incorrect. Refer to: Spindle Motor - Wiring Configurations.
The vector drive is defective. The vector drive is defective. Refer to: Vector Drive - Troubleshooting Guide.
Alarm 174 Tool Load Exceeded Tool Load limit incorrect View the Advanced Tool Managment (ATM) tab to adjust user defined tool load limit
Aggressive feedrates Adjust your program for a more conservative feedrate
Machine is experiencing surface finish issues Preload set to the bearings may be incorrect

Perform the Spindle Deflection Test - Mill procedure for preload verification

NOTE: Only perform this procedure AFTER all other troubleshooting steps outlined in the Mill Spindle Inspection Report, linked at the top of this page, have been performed. 

Lubrication

Corrective Action:

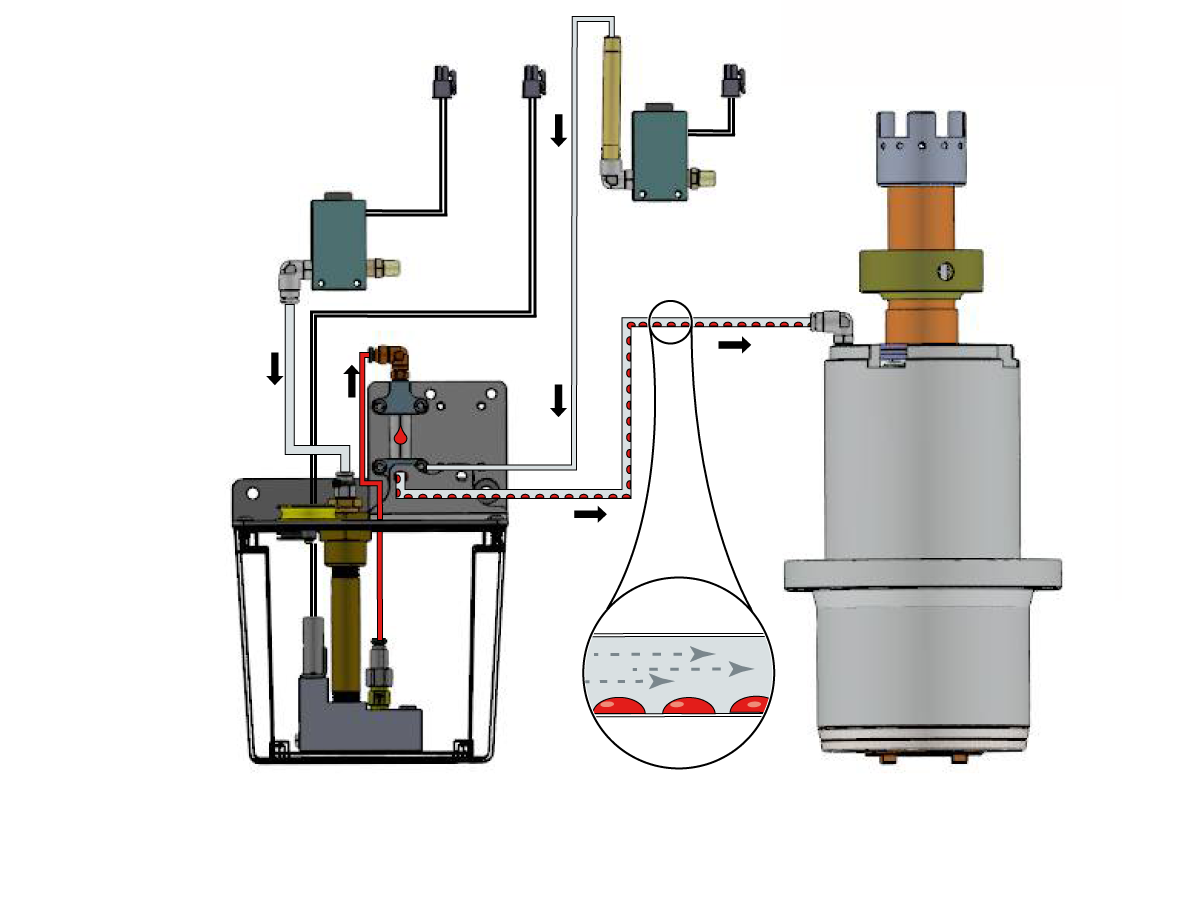
Insufficient or excessive oil supply to the spindle bearings can cause the spindle to overheat. Using the incorrect spindle lubrication oil on the spindle bearings can cause the spindle to overheat. Make sure you use the correct spindle lubrication (SHC 625) and the air pressure to the spindle is correct.

Inspect all tubing, hoses and fittings in the lubrication system for leaks. Check for puddles of oil to help locate leaks.

Go to Haas Spindle minimum lubrication troubleshooting for additional troubleshooting information

Go to Mechanical Bijur Lube Pump - Troubleshooting Guide for additional troubleshooting information.

Drive Belt

Corrective Action:

Power off, lock and tag out machine. Remove the spindle head covers. Disconnect the air supply to the machine. Remove the four 3/8-16 SHCS on the TRP. Remove the TRP and set it aside.

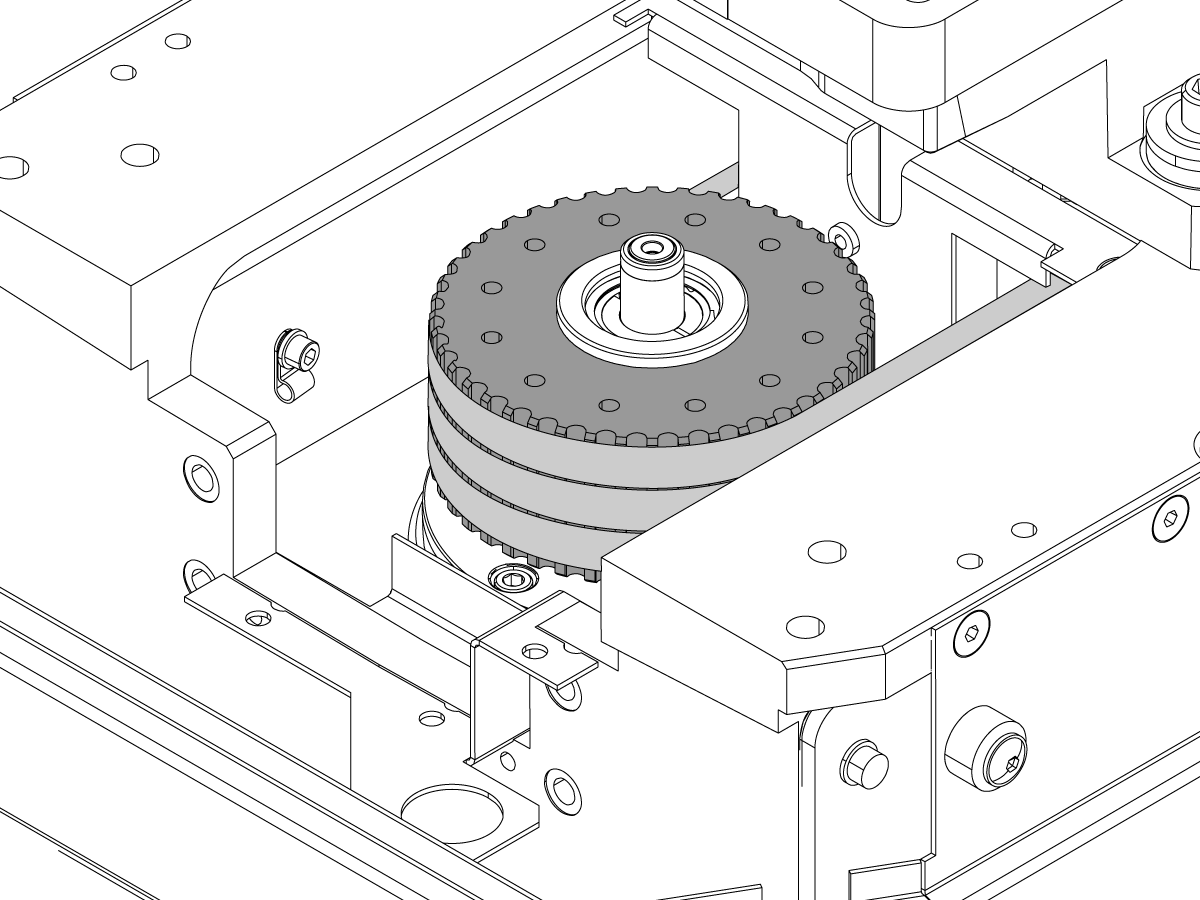
Inspect the spindle drive belts and pulleys for damage: Look for frayed, stretched or broken belts, and damaged or stripped cogs on the inside surface of the belt. Refer to the Drive Belt - Troubleshooting Guide.

Encoder Pulley/Belt

Corrective Action:

Make sure the encoder belt is adjusted correctly and is not damaged. Replace a damaged or worn belt.

Make sure the encoder pulley is not worn. Make sure the set screw is tight.

Reference Spindle Non-Contact Encoder (NCE) - Troubleshooting Guide - NGC for more information about the encoder assembly.

Drawbar Force

Corrective Action:

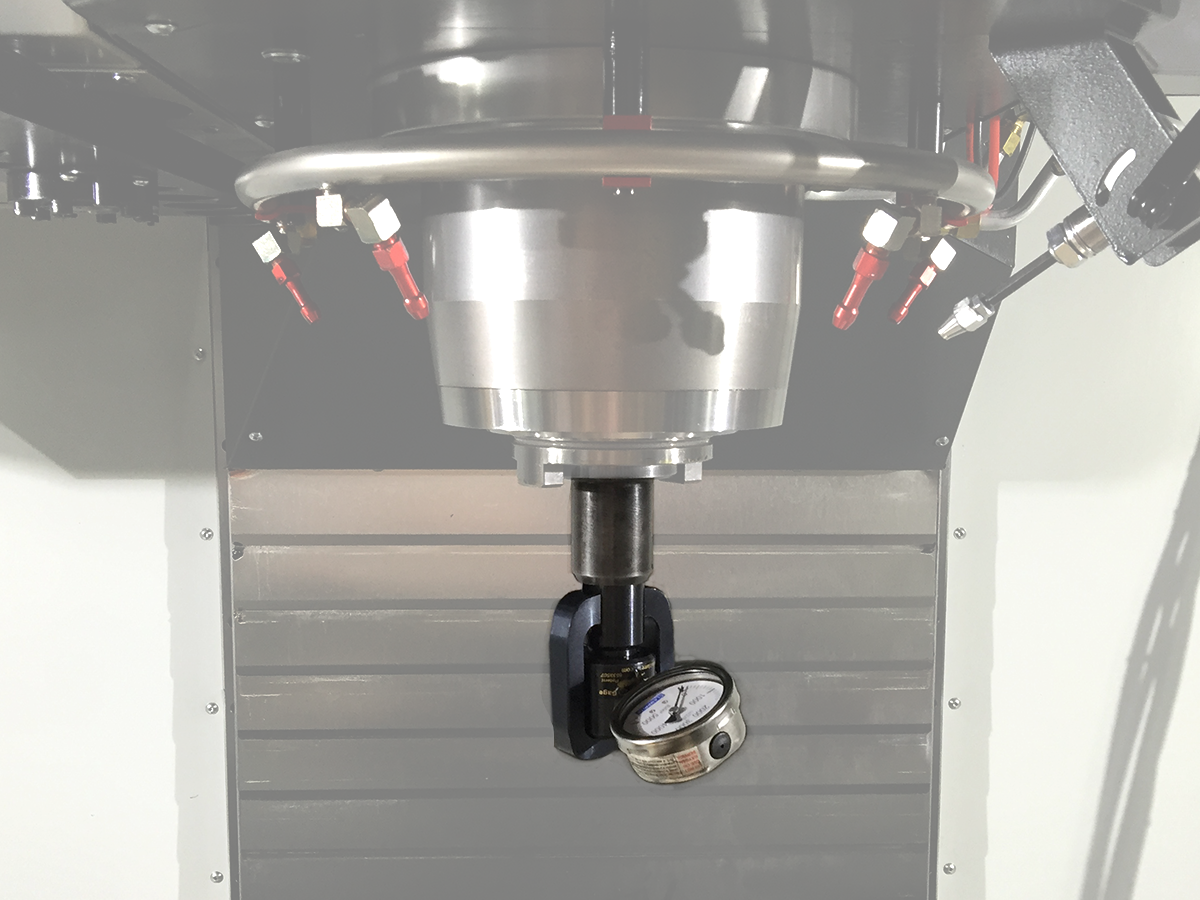
Use a drawbar force gauge in the spindle to measure the clamp force. Refer to Spindle - Drawbar Force Reference Table.

If the drawbar force is incorrect, go to Spindle - Drawbar - Troubleshooting Guide.

Coolant

Corrective Action:

If the machine has through-spindle coolant (TSC), different types of coolant can cause the toolholder to stick in the spindle. Consider a different type of coolant if the symptom persists.

Workholding

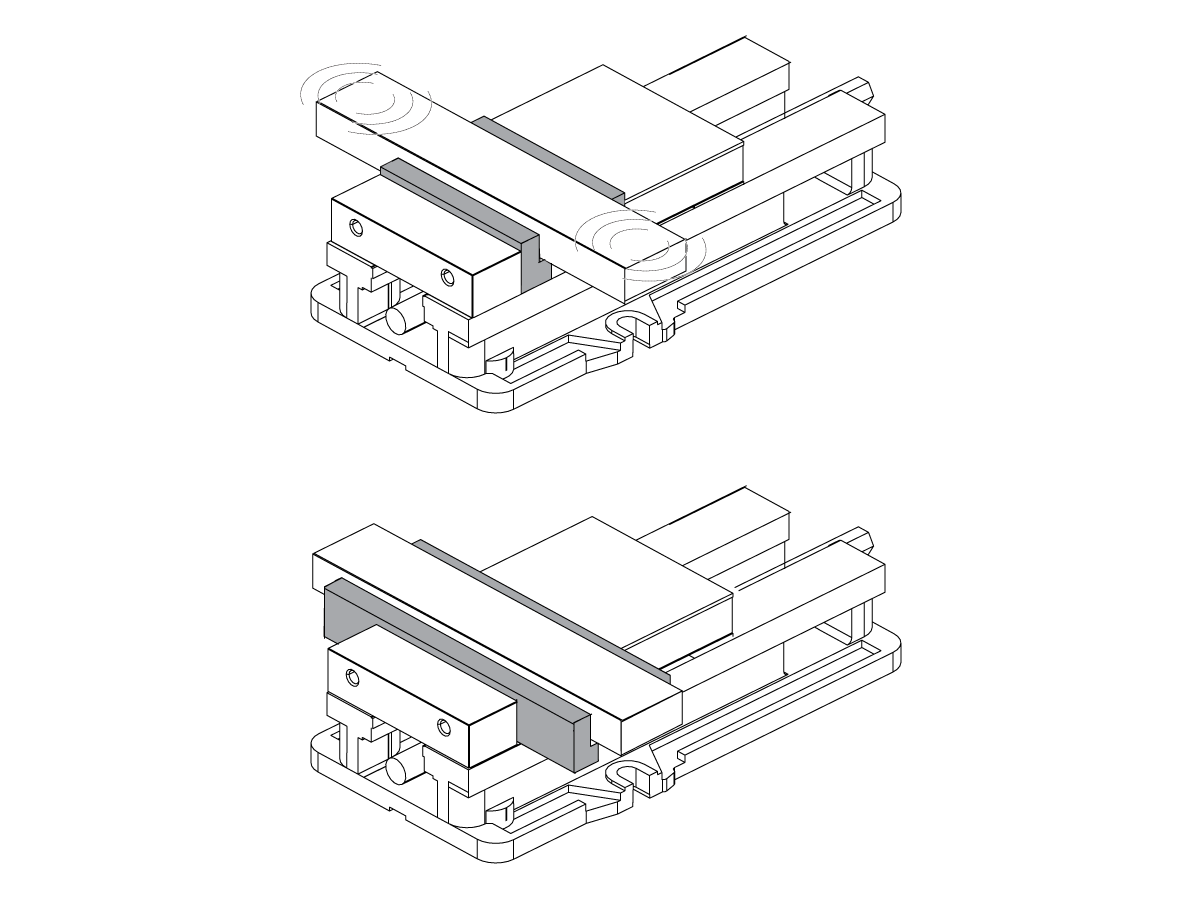
If the workholding does not adequately support the part, it can cause chatter.

Corrective Action:

Stiffen the workholding if possible.

Lower the cutting load with adjustments to the tool selection, or the program.

Balance

Corrective Action:

Make sure the spindle is balanced. Your local HFO can balance these spindles:

  • All belt-driven spindles
  • Inline spindles made after August, 2016

All tooling that runs over 10K RPM must be balanced. Do not exceed the manufacturer recommendations for special tooling.

Toolholder Is Sticking

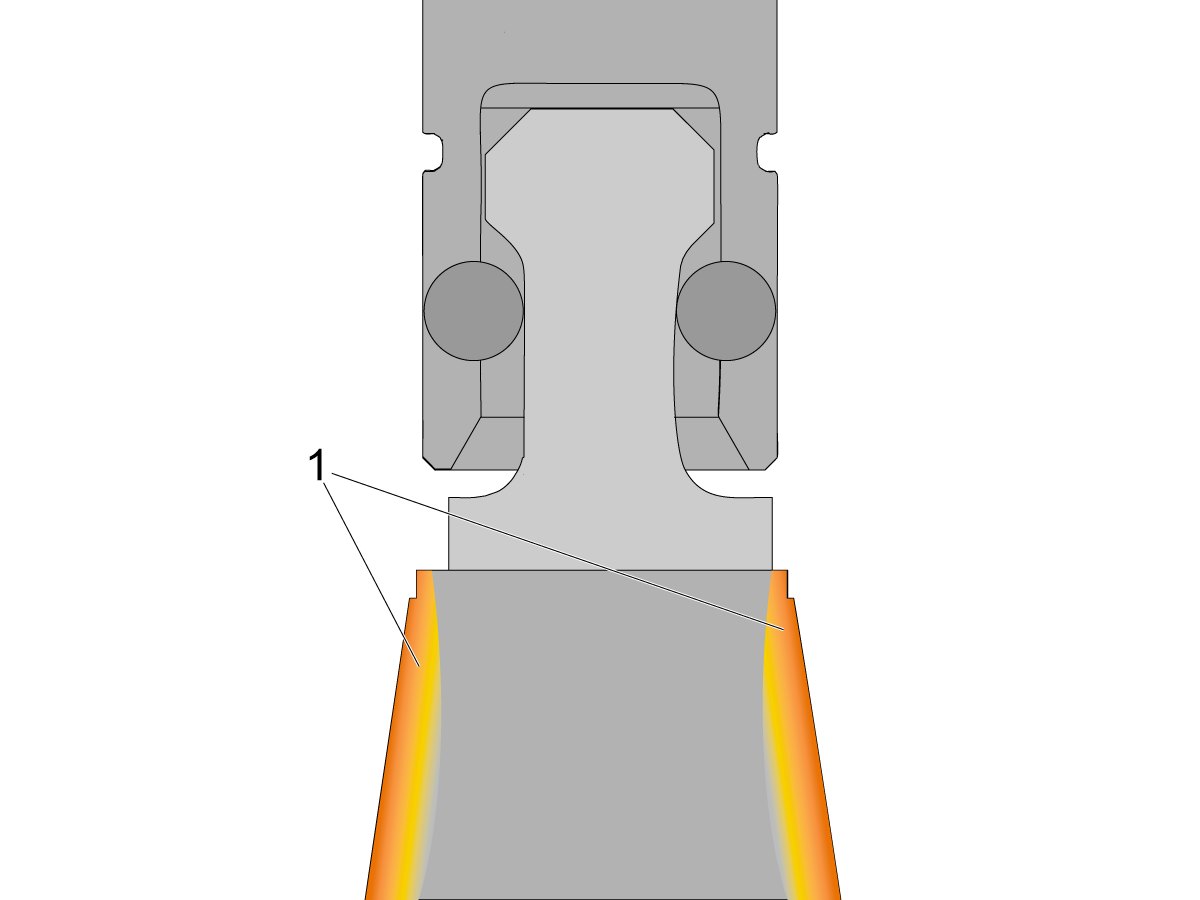
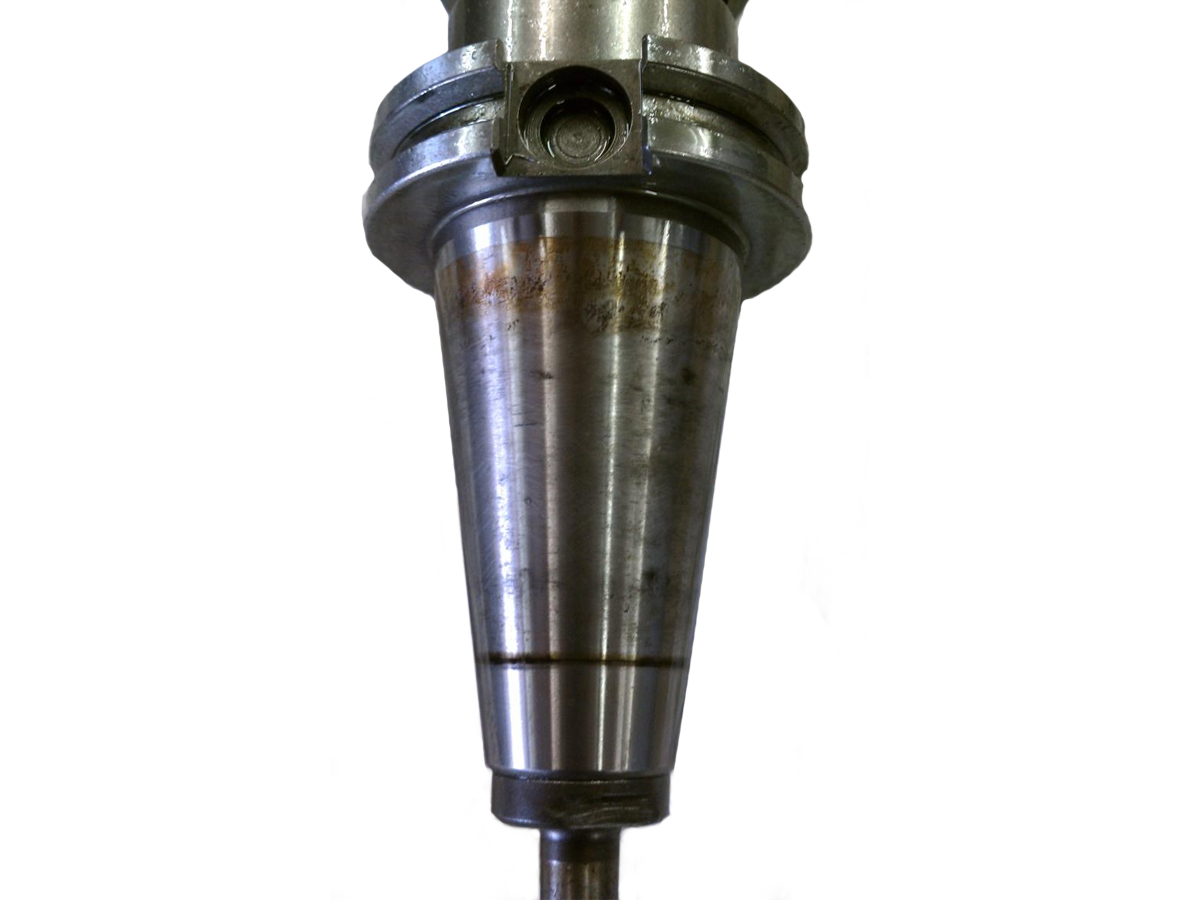
This effect can occur while the machine is in operation if a cold toolholder is placed into a warm spindle taper. This creates thermal expansion [1] on the sides of the toolholder and makes it stick in the spindle taper before it is released.

A common example is if you change from a hot cutter to the cool spindle probe to check your part at the end of a cycle. If the cool probe is left in the hot spindle overnight, it will make a "popping" noise when it is released.

Corrective Action:

Clean the toolholders and spindle taper. Check for damaged toolholders before you put them back in the machine. A damaged toolholder can cause damage to the spindle taper and create tool runout or problems with finish.

Make sure the pull stud is lubricated. Refer to the Mill - Tooling - Maintenance procedure.

Toolholder Is Fretting

Corrective Action:

Look for fretting on the toolholders. Long tools can cause fretting on toolholders if you use them aggressively. If there is fretting on the toolholder, or if the symptom persists, go to Spindle - Drawbar - Troubleshooting Guide.

Bearings

Corrective Action:

Damaged bearings in the spindle can cause finish issues on the part. Contact your local HFO for a vibration analysis to see if the bearings are damaged.

7.3 40T - Spindle Drawbar - troubleshooting

Recently Updated

Spindle - Drawbar - Troubleshooting Guide


Introduction

  1. Drawbar
  2. Toolholder
  3. Retention balls
  4. Pull stud
  5. Belleville springs

Symptom Table

Symptom Possible Cause Corrective Action
The toolholder frets in the taper. The tool pulls out of the taper. Check for damaged Belleville spring washers.
The part has a poor finish. The tool length is too long. Refer to the tool manufacturer's specifications.
The toolholder drops before the tool changer can grab it. The clamp force on the toolholder is too low, or the TRP pre-charge is not set correctly. Check the clamp force and pre-charge air pressure.
(TSC Only) Excessive coolant comes out of the coolant tube behind the spindle. The carbide insert on the drawbar is damaged. Check the carbide insert in the drawbar and TRP for damage.  Note: If the machine has a pre-charge system check that the pre-charge air pressure is set correctly.  Refer to the tool release piston pre-charge adjustment procedure: VMC - 30/40-Taper - Tool Release Piston - Pre-charge - Adjustment
The drawbar does not release the toolholder smoothly. The pull stud angle is pitted or damaged. Check the pull stud for damage.
The TRP sensor(s) are not aligned. Align the tool release piston sensor(s).
The air pressure or volume to the TRP is too low. Check the air pressure and volume.
The drawbar retaining balls are dry. Apply RED-i grease to the retaining balls.
Toolholder makes a "popping" noise when it is released. The toolholder and spindle taper are dirty. Clean the taper.

40T and 50T Belted Spindles

Pull studs will not enter into spindle taper, carbide tips on drawbar and TRP are damaged prematurely,

And possibly one of the following alarms:

Alarm 130 Tool Unclamped
Alarm 134 Tool Unclamp Fault
Alarm 9970 Unexpected Tool Release

There is a small delay from the I/O PCB that causes the pre-charge solenoid not to turn OFF. Order service kits 93-3451 & 93-3452 and follow the Low Load Solenoid Valve Kit - Installation procedure.

Toolholder Is Fretting

Corrective Action:

Verify that the tool length, axis feed, and spindle RPM are correct according to the tooling manufacturer's recommendations.

Drawbar Force

Corrective Action:

Check the clamp force with a clamp force measuring tool and refer to the Drawbar Force Reference Table. If the pull force is low, the drawbar is faulty.

Belleville Springs

Corrective Action:

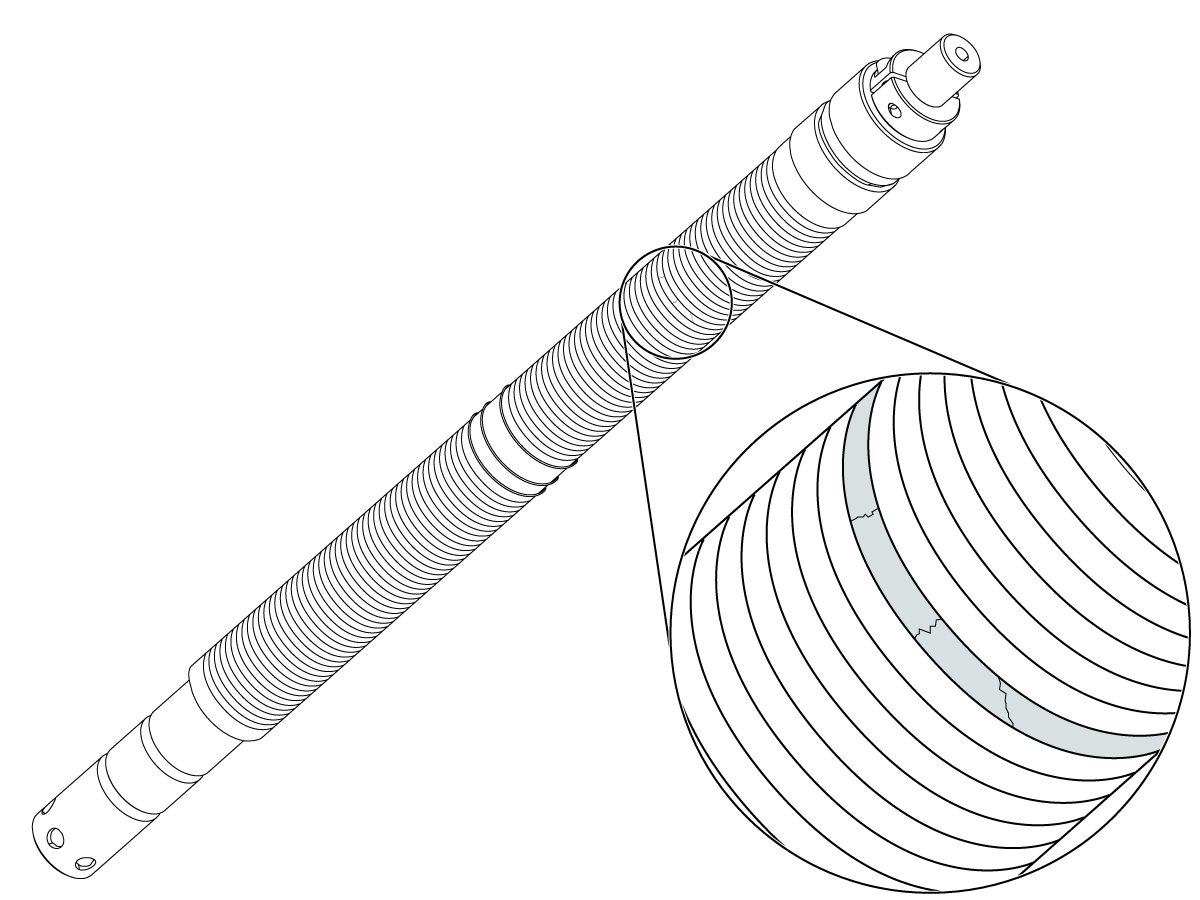
If the Belleville springs on your drawbar are damaged, you must replace the drawbar. The drawbar in inline spindles cannot be removed. If the drawbar in an inline spindle is damaged, you must replace the entire spindle assembly.

Check for tools getting stuck in the spindle,  inspect the pull studs and spindle taper for damage.

Pull Studs

Corrective Action:

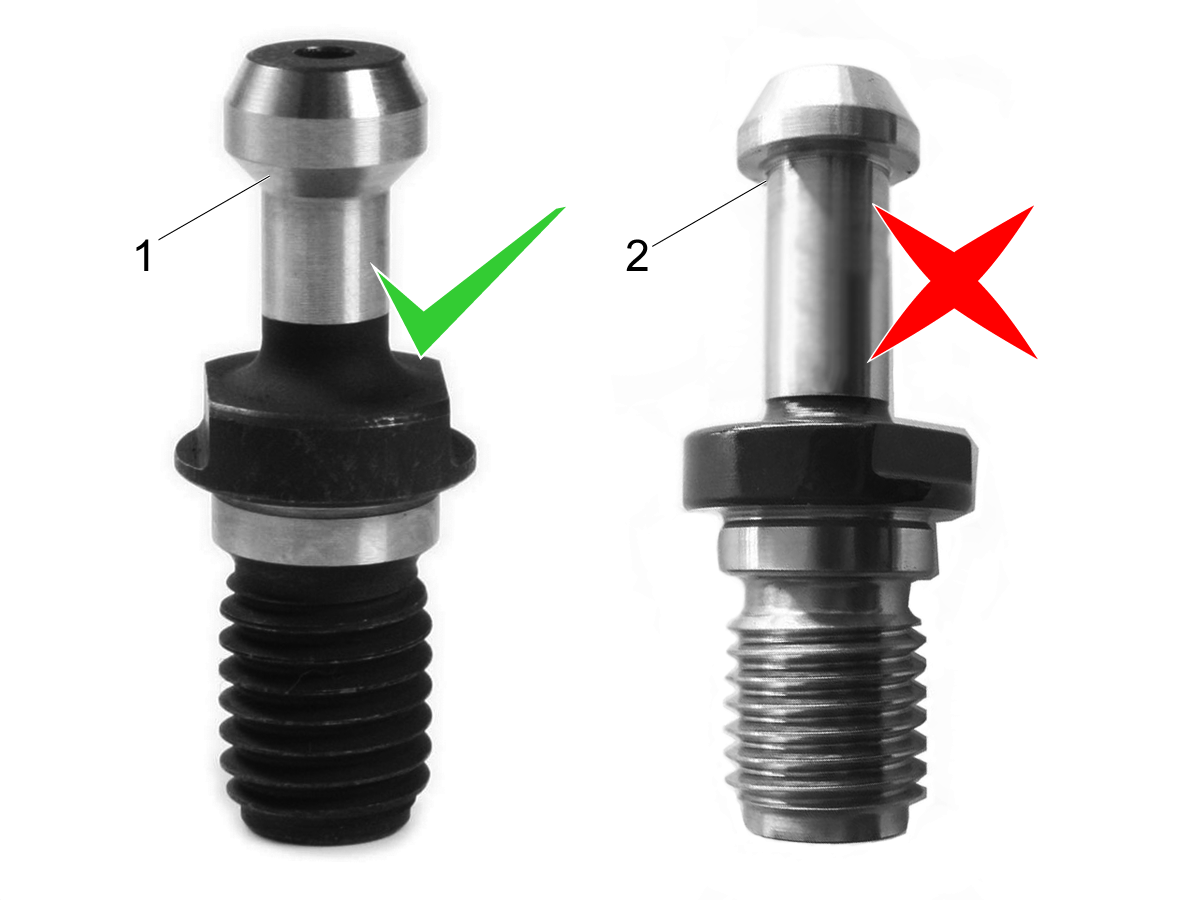
Remove the toolholder from the spindle. Check for damage to the pull stud. The pull stud must have a 45° angle [1].

Ball marks on the edge of the pull stud indicate that the drawbar does not open completely.

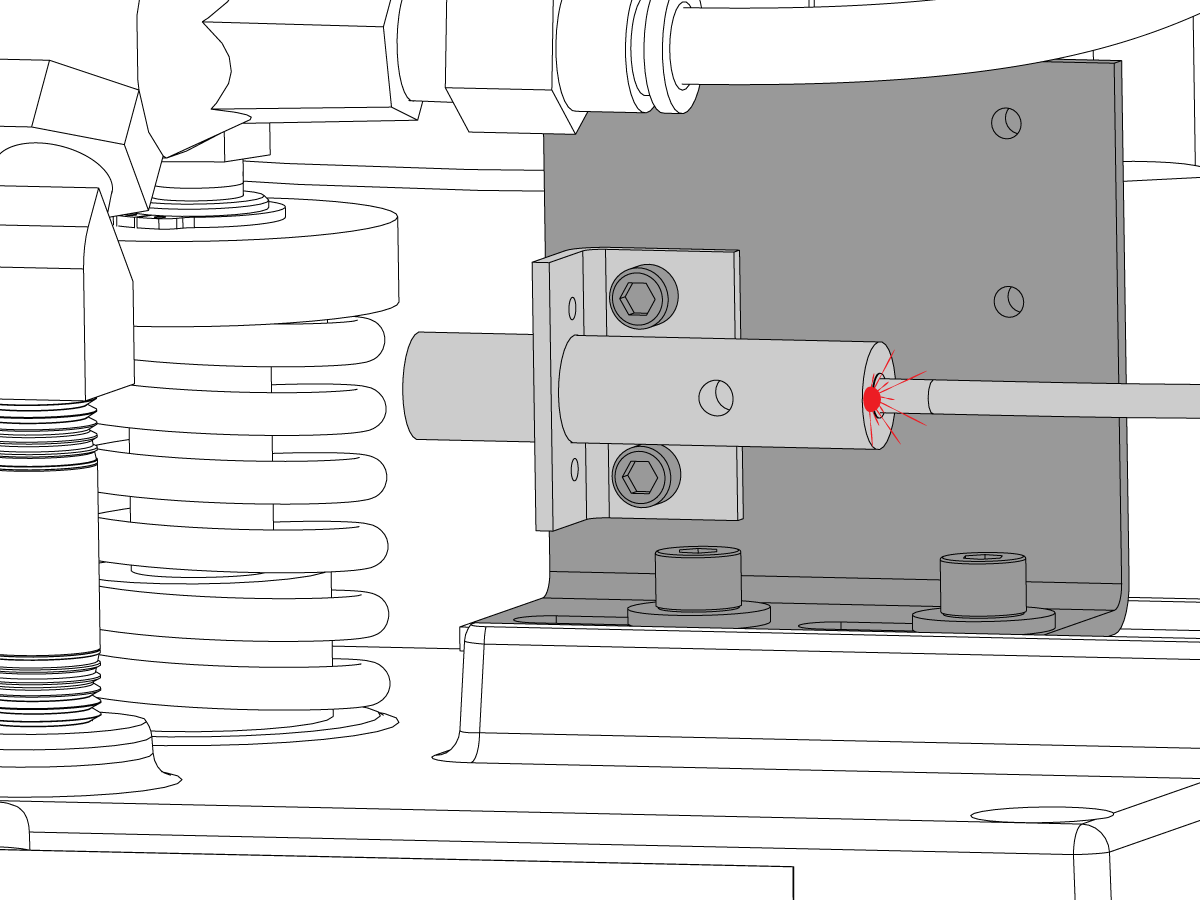
Refer to the TRP clamp/unclamp sensor adjustment procedure.

TRP Sensor(s)

Corrective Action:

Refer to the TRP clamp/unclamp sensor adjustment procedure.

Air Pressure

Corrective Action:

Verify that the air pressure to the TRP solenoid [1] is 90-psi (6.21 bar).

If the volume is correct, there should be only a 10-psi (0.69 bar) air pressure drop during a tool change. Use an inline air gauge to measure the change in air pressure.

Check for kinks or splits in the air hose that goes to the TRP assembly [2].

Make sure the volume of air supplied to the machine is sufficient. Refer to New Machine Setup/Pre-Installation.

Lubrication

Corrective Action:

To grease the retaining balls, put a ball of RED-i grease on top of a pull stud.

Put the toolholder into the spindle. Clamp and unclamp (4) or (5) times to load the grease onto the retaining balls.

Remove the toolholder. Wipe excess grease from the toolholder and spindle taper.

Contamination

Corrective Action:

Clean the toolholders and spindle taper. Check for damaged toolholders before you put them back in the machine. A damaged toolholder can cause damage to the spindle taper and create tool runout or problems with finish.

7.4 Tool Release Piston - Troubleshooting Guide

Recently Updated

Tool Release Piston (TRP) - Troubleshooting Guide


Introduction

  1. ROTARY UNION
  2. SPRING RETAINER
  3. COMPRESSION SPRING
  4. SHCS 8-32 X 3/8
  5. PROXIMITY SENSOR
  6. SHCS 1/4-20 X 2
  7. SWITCH MOUNT BLOCK
  8. O-RING 2-121 BUNA
  9. SHCS 3/8-16 X 5
  10. FITG HOSE BARB1/2 NPT1/4M STR BRASS
  11. FITG NPT1/8M PLUG STL W/THREAD SEALANT
  12. TRP HOUSING
  13. SPACER UPPER
  14. TRP PISTON
  15. O-RING 2-446 BUNA
  16. O-RING 2-015 BUNA
  17. VALVE CHECK NPT-1/8-F X NPT-1/8-F BRASS
  18. O-RING 2-327 VITON
  19. SPACER LOWER
  20. TRP SHAFT
  21. TRP SUB-PLATE
  22. TRP FORK SPACER
  23. TRP FORK
  24. WASHER 1/2 STEEL .018THK X 1.00O
  25. SHCS 1/2-13 X 3 1/2


  1. 40-taper
  2. 50-taper
  3. 40-taper inline drive

Symptom Table

Symptom Possible Cause Corrective Action
The TRP does not activate when commanded. The solenoid is inoperable. Test the solenoid.
The air volume is low. Check the air system.
Parameter 71 is incorrect (CHC). Check the value of Parameter 71
Alarm 134 TOOL CLAMP FAULT occurs on machines with M18.27 and lower. The air volume is low. Check the air system.
The retaining ring that holds the drawbar actuator pins is defective (Inline Spindle Only). Replace the spindle with the latest revision of the spindle, which uses a roll pin to retain the drawbar actuator pins.
The bearingless union loosened from the center shaft (50 Taper Only).
  1. Remove the TSC parts from the TRP.
  2. Remove the TRP.
  3. Tighten the 50 Taper union adapter to 100 ft-lbs (136 Nm). Use a 5/8" hex tool to hold the center shaft in position while you tighten the 50 Taper union adapter.

    Note: The spring retainer on the TRP energizes the TRP proximity-sensor. The spring retainer changes height when the 50 Taper union adapter loosens from the center shaft.

  4. Install the TRP.
  5. Make sure the spring retainer energizes the TRP proximity-sensor.
  6. Install the TSC parts onto the TRP when the 50 Taper union adapter is tightened correctly.
Alarm 134 TOOL CLAMP FAULT occurs on machines with M18.28 and higher. A ground wire is loose in the electrical cabinet. (Next Generation Control Only) Make sure all of the ground wires that are inside of the electrical cabinet are tight. Make sure all the of axis motor-cables are tight.

The TRP hits the drawbar and makes a loud banging noise.

The precharge regulator is not adjusted properly. Properly adjust the precharge regulator. Refer to the Precharge Regulator section below. 
Precharge pressure incorrect on a fixed regulator. Replace the fixed regulator. Refer to the Precharge Regulator section below.
The TRP does not push out enough to release the tool. There is an air leak. Check air system and low air delay Parameter 76.
The drawbar is damaged. Inspect the drawbar.
The TRP pushout is not properly adjusted. Verify and adjust the drawbar height.
The piston o-ring has no lubrication, or the piston/bore or o-ring is damaged. Replace the TRP.
The TRP retracts slowly.

Alarm 130 TOOL UNCLAMPED

Alarm 131 TOOL NOT CLAMPED.

The return spring is broken. Replace the TRP base assembly.
The humphrey valve is worn.
A worn humprey valve (quick exhaust valve) can cause air to leak into the piston and cause the TRP to retract slowly. Replace the humprey valve.
The exhaust muffler is clogged. Test the exhaust muffler.
The piston o-ring has no lubrication, or the piston/bore or o-ring is damaged. Inspect the piston o-ring.
The precharge solenoid is getting stuck due to contamination. Inspect the precharge solenoid for contamination. For CALM machines inspect solenoid manifold inside the lube panel for contamination. See Water Separator Filter section below.
The inline spindle is seized. The inline spindle won't turn.

Machines with I/O PCB 34-3490A/B

Intermittent Alarm 131 TOOL NOT CLAMPED
                         AND
It is using a Digital SMC Solenoid.

There is a small delay when the solenoid is commanded off, thus causing the alarm to be generated.  Order service kits 93-3451 & 93-3452 and follow the Low Load Solenoid Valve Kit - Installation procedure.

Solenoid

Corrective Action:

Clean the solenoid valve.

Press and hold the tool release. Check the voltage to the solenoid. It should have 120 VAC. If there is no power, make sure it has a good connection to the I/O PCB.

If the connection to the I/O PCB is good, refer to Solenoid - Troubleshooting Guide to troubleshoot the solenoid.

Air Pressure

Corrective Action:

Check the air pressure supply.

Check the air volume supplied to machine. Refer to the Air Requirement section in the New Machine Setup / Pre-Installation for required hose size and other instructions.

Check for air leaks in supply hose / solenoid exhaust / TRP.

Verify Parameter 76 Low Air Delay is set to 1500.

Parameter 71 - Classic Haas Control (CHC)

Corrective Action:

Check the value of Parameter 71, DRAW BAR OFFSET.

Model P71 Value
(Sigma 1 Motors)
P71 Value
(Sigma 5 Motors)
DM/DT N/A 0
EC400 0 0
EC1600 6000 40000
ES 6936 0
GR 12000 66600
GR408 12000 0
MDC 12000 0
Mini Mill 12000 111000
S Mini Mill 12000 66600
Office Mill 12000 12000
OM1A, OM2A 14000 112000
SR 12000 0
Toolroom 12000 111000
UMC N/A 66600
VF1-VF4 12000 83300
VF2SS-VF4SS 6936 55500
VF5/40-VF12/40 6936 66600
VF3/50-VF12/50
12000 40000
VM2-VM3 6936 111000
VM6 12000 111000
VR 12000 0
VS 12000 0

Precharge Regulator

Corrective Action:

Adjust or replace the precharge regulator:

  • Adjustable regulator [1] - Properly adjust the precharge regulator. If the precharge regulator is damaged and is unable to adjust, replace it.
  • Fixed nonadjustable regulator [2] - Verify the pressure, replace the precharge regulator if pressure is incorrect.

Note: 40T inline spindle machines (VF,VM,UMC) built after February, 2017 do not have a precharge regulator. Refer to: HSG-N 06-05-2017

Drawbar

Corrective Action:

Remove and inspect spindle drawbar for broken spring washers or any other damage.

Inspect spindle drawbar for damaged o-ring seals (TSC machines only). Go to Spindle - Drawbar - Troubleshooting Guide to troubleshoot the drawbar.

Return Spring

Corrective Action:

If the return spring is broken, replace the TRP base assembly.

Pushout

Corrective Action:

40T TSC Belt Drive Only - Inspect the TRP tool release bolt, or carbide tip for excessive wear or damage.

Verify the spindle drawbar pushout and sensor adjustments.

Adjust the height by adding or removing shims. Refer to the TRP switch adjustment procedure for more information.

Exhaust Muffler

Corrective Action:

Remove the exhaust muffler from the solenoid and test TRP operation. Replace the exhaust muffler if necessary.

O-ring

Corrective Action:

40T Belt Drive Only - Remove the TRP and apply lubricant to the TRP housing [1].

Install the TRP on the machine and in the correct place. Cycle the machine. DO NOT ACTIVATE TRP WHEN THE TRP IS NOT IN PLACE, DAMAGE TO THE TRP MAY OCCUR.

The TRP base is not serviceable due to the high spring pressure. If damaged, the assembly must be replaced.

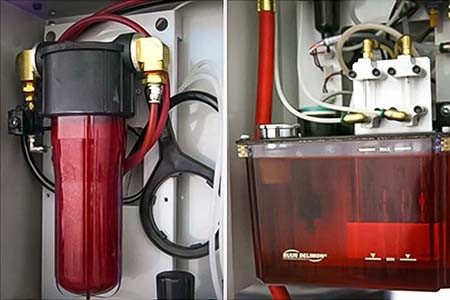
Water Separator Filter

The filter in the water separator can come loose inside of the water separator casting. The filter moves around inside of the canister and breaks into small pieces. These pieces contaminate components in the pneumatic systems. You should always check this filter when troubleshooting any pneumatic problem.

Corrective Action:

  1. Remove and replace the water separator filter [2] (P/N 58-1391; Muffler Poly 100 Micron NPT-3/8M). Put Sikaflex on the threads of the filter.

     Note: Use spark plug pliers or a similar tool to loosen and tighten the filter.

  2. Remove and clean the casting [1], the O-ring [3], the screen [4], and the cap [5]
  3. Remove and clean the solenoids.
  4. Remove and clean the air mufflers.
  5. Remove and clean out the all of the pneumatic tubing with compressed air.

TRP Modification Procedures

Procedure Description

Tool Release Piston - Proximity Sensor - Modification - Mini Mill - AD0346

This procedure tells you how to replace the TRP on a Mini Mill for machines made after February 2017.

Recently Viewed Items

You Have No Recently Viewed Items Yet

Feedback
Haas Logo

美元价格不包括关税、报关费用、保险费、增值税及运费。
USD prices DO NOT include customs duty, customs fees, insurance, VAT, or freight.

人民币价格包含关税、报关费用、货运保险和增值税, 但不包括运费。
CNY prices include customs duty, customs fees, insurance, and VAT. DOES NOT include freight.

Haas Delivered Price

This price includes shipping cost, export and import duties, insurance, and any other expenses incurred during shipping to a location in France agreed with you as a buyer. No other mandatory costs can be added to the delivery of a Haas CNC Product.

KEEP UP WITH THE LATEST HAAS TIPS AND TECHNOLOGY...

Sign up now!   

HAAS TOOLING ACCEPTS THE FOLLOWING:

  • Service & Support
  • Owners
  • Request Service
  • Operator Manuals
  • Haas Parts
  • Rotary Repair Request
  • Pre-Install Guides
  • Shopping Tools
  • Build & Price a New Haas
  • Available Inventory
  • The Haas Price List
  • CNCA Financing
  • About Haas
  • DNSH Statement
  • Careers
  • Certifications & Safety
  • Contact Us
  • History
  • Terms & Conditions
  • Haas Tooling Terms & Conditions
  • Privacy
  • Warranty
  • Haas Community
  • Haas Certification Program
  • Haas Motorsports
  • Gene Haas Foundation
  • Haas Technical Education Community
  • Events
  • Join the Conversation
  • Facebook
  • X
  • Flickr
  • YouTube
  • LinkedIn
  • Instagram
  • TikTok
© 2025 Haas Automation, Inc – CNC Machine Tools

This site is protected by reCAPTCHA and the Google Privacy Policy and Terms of Service apply.

2800 Sturgis Rd., Oxnard, CA 93030
Toll Free: (888) 817-4446 / Fax: 805-278-8554